Finishing An AR-15 80% Lower Receiver
-
Fire control pocket solid -
(Trigger
slot tutorial at bottom of this page)
By: Justin / jwh02017
Rev. Date: 11/30/08
***
NOTE: This tutorial uses Kevin's newer
style 80% lowers ***
Outline:
I. Introduction
II. Tools Used
III. Diagram & Blueprint
IV. Tutorial
V. Conclusion
I.
Introduction:
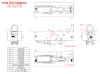
In this tutorial I will demonstrate how easy it is to complete an 80% AR15 lower receiver using the CNC Gunsmithing
jig and the milling adapter kit. www.cncguns.com You may have seen some of the other projects I�ve completed using CNC machining centers. Although viewing those projects is neat, it�s usually not possible for the average guy to use CNC equipment to complete his lower. So that is why I want to show how somebody can complete an AR15 80% lower with typical tools usually found in their garage. There are several ways to complete an 80% lower. So what I demonstrate here may not be the way you finish your 80%�er, but it�s what I thought was the easiest at the time with the tools I had access to in my garage. The optional items in the Tools Used list
below are items that make the job easier, but they aren�t required.
II.
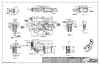
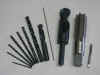
Tools Used:
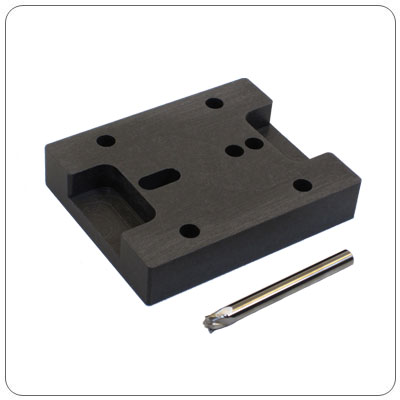
- CNC Gunsmithing Drill
Jig and Milling Adapter Kit
- 80% AR15 Lower Receiver from
Kevin (with solid fire control
pocket)
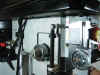
- 12� Craftsman Drill Press - 5 speeds (540-3600 RPM)
- Drills & Taps:
- (C) 1/8 Drill
- (D) 5/32 Drill
- (E) 3/8 Drill
- (F) #40 Drill
- (G) 1/2 Drill
- (I) #42 Aircraft Extension Drill
- (J) #3 Drill
- (K) 1/4 - 28 Tap
- 3/16 Allen Hex Wrench
- Cutting Fluid (WD-40)
- Calipers
(Optional Items)
- Transfer Punch Set
- 2x4 piece of wood - 7.25� long
- 2x4 piece of wood - 2.50� tall
- Columbian Clamp - 15� long
- Irwin Quick Grip - 8" & 12�
- Sharpie Marker
- Dremel Tool w/ Grinding Stone & Sanding Bands
III.
Diagram & Blueprint:
Click
on the pics below to download pdf files
of the Hole
Size Diagram and AR15 blueprint.
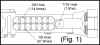
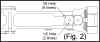
The
diagram will show you which size drill
or tap to use in each location.
The blueprint can be used for reference
during the project. Fig.1 and Fig.
2 detail hole locations when using the
milling adapter kit.
IV.
Tutorial:
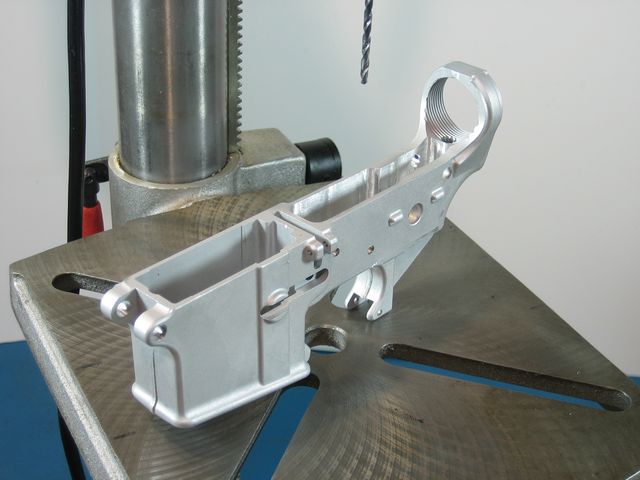
I started with
the newer 80% AR15 lower receivers that Kevin
is now selling (Email:
audibk@yahoo.com)
The new 80%'ers Kevin sells has the fire
control pocket solid. He sells the nicest
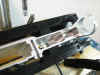
80% forged receivers I�ve ever seen. I bead blasted the lower before I started this tutorial to give a better contrast of where cuts will be made.
Click on the image below to see what the
lowers look like directly from Kevin�

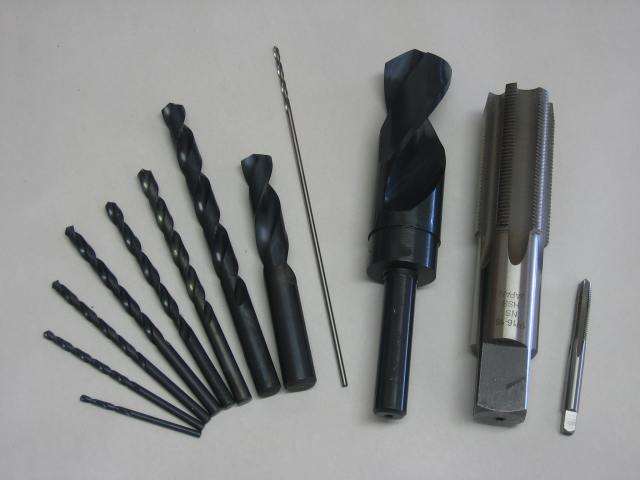
Below is a pic of the drills & taps I
used in the original 80% tutorial.
I did not use all of these tools in this
new tutorial, but I wanted to use the
same pic to show the difference in all
the tools. Depending on how you are planning on finishing your lower, you may or may not need all of these tools.
I used the same drills and tap from the
original tutorial so they weren't brand
new but close to it. You don't
have to use new drills, you just need to
make sure they are good and sharp to
avoid any possible problems. The drill press was operated at the lowest spindle speed of 540 RPM�s throughout this project. I feel this spindle speed is safe for this type of manual work. Any higher RPM and stuff happens a lot quicker and that�s not always a good thing. For reference, an average spindle speed when I run the CNC machines is 10,000 RPM. With CNC, the machine controls everything, so there�s no human error, thus you can run at higher spindle speeds.
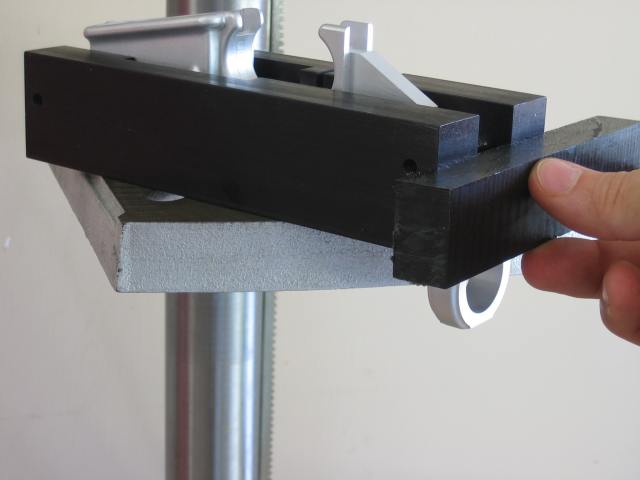
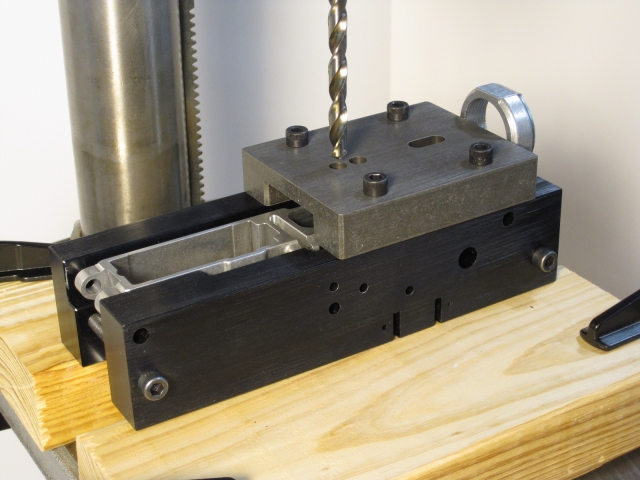
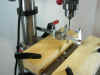
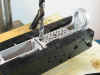
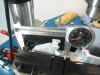
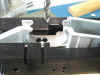
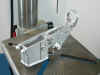
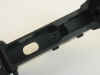
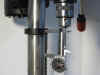
The first thing I done was aligned the receiver in the jig. To do this I turned the jig upside-down and set it on the edge of the drill press table. Then I took a flat object and made sure the back of the buffer tower was flush with the back of the jig. Once I was sure both surfaces were flush, I tightened the two
1/4-20 socket head cap screws to around
10 ft-lbs of torque. Below is a
reference pic from the original tutorial�
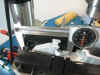
A quicker way of aligning the lower in
the jig is to run a couple 0.250
diameter pins through the front and rear
take down pin holes. I actually
used a couple worn out 1/4 carbide
endmills, but you could use a couple
drills or anything else you have laying
around that is 0.250 diameter.
These 0.250 pins will insure the
receiver does not move in the jig while
you remove the material from the fire
control area. Below is a pic of the
lower in the jig ready to go...
For
the rest of this tutorial I will mostly
be demonstrating how to use the new
milling adapter kit. During this
tutorial I may make references to the
original tutorial (fire control pocket
milled out tutorial).
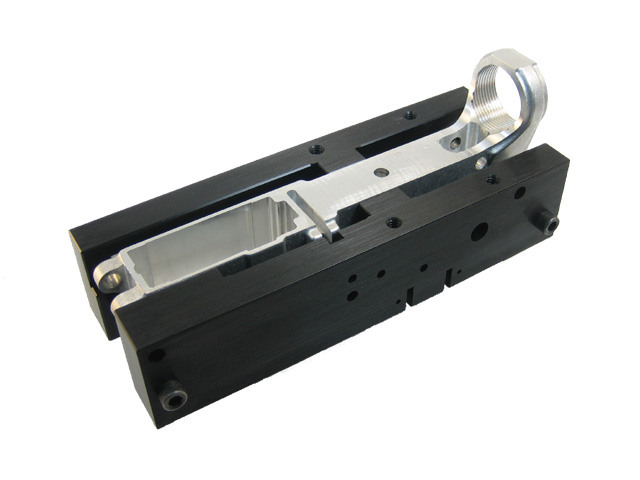
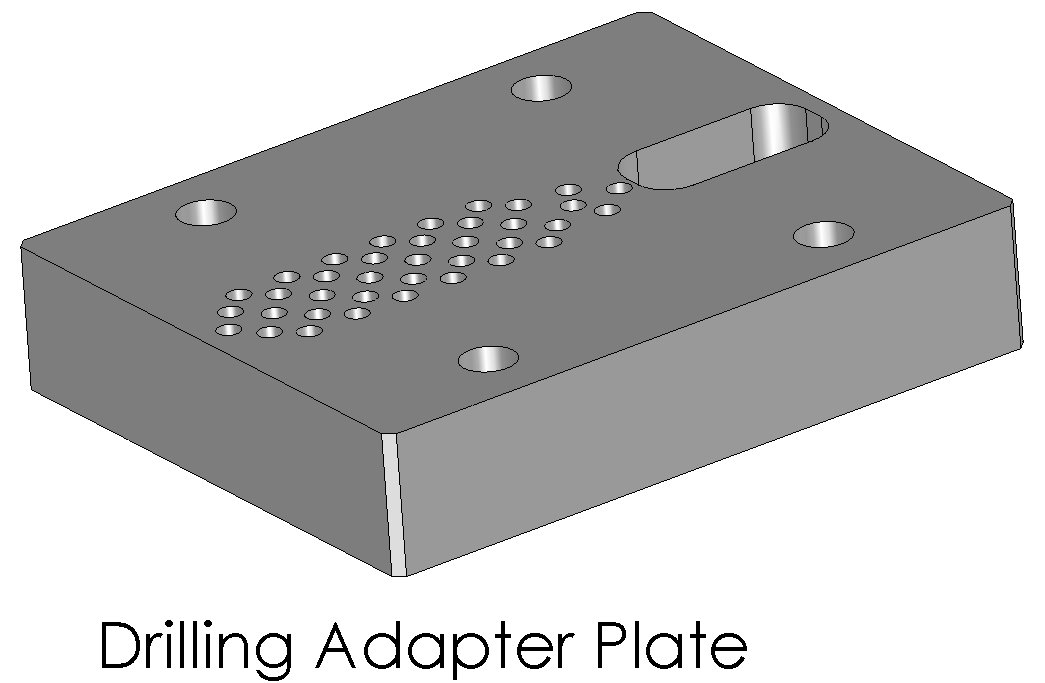
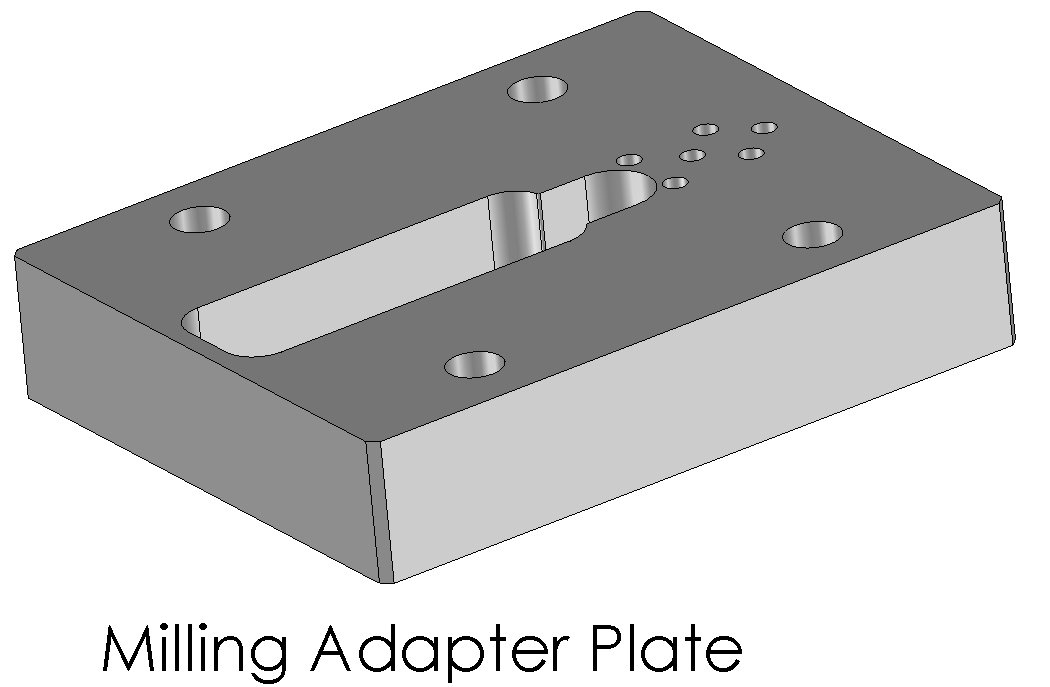
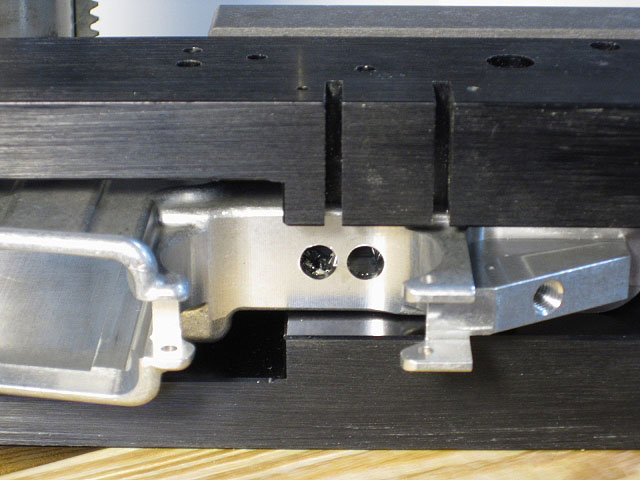
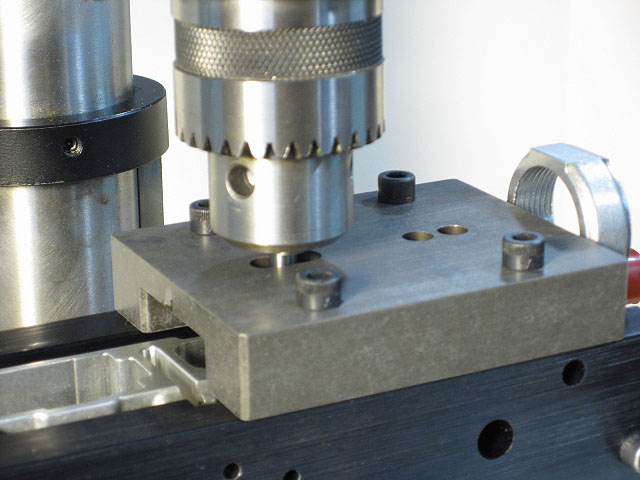
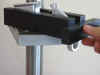
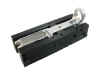
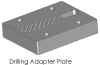
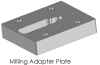
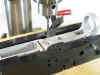
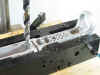
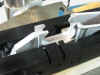
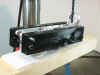
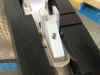
The
next thing to do after the receiver is
in the jig is to attach the drilling
adapter plate. The difference
between the two plates are shown
below...
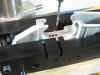
To
attach the adapter plate to the drill
jig, run the 4 bolts through the holes
and loosely tighten the bolts.
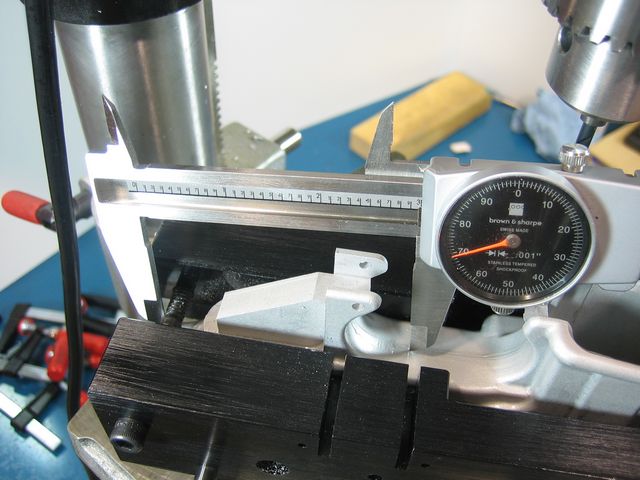
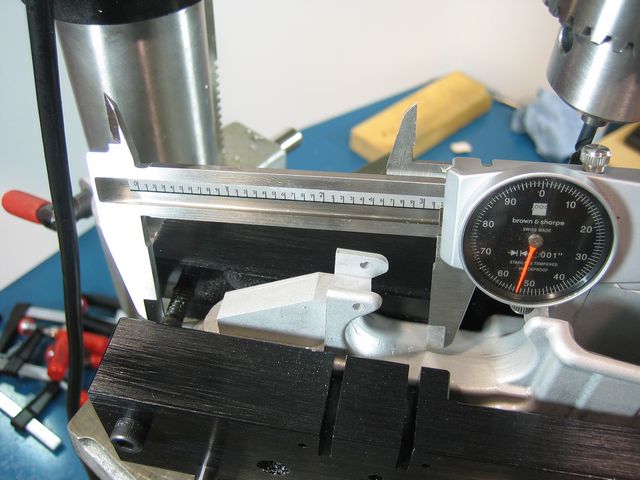
Make sure the distance from the front of
the jig to the adapter plate is 3.410
like shown in this pic...
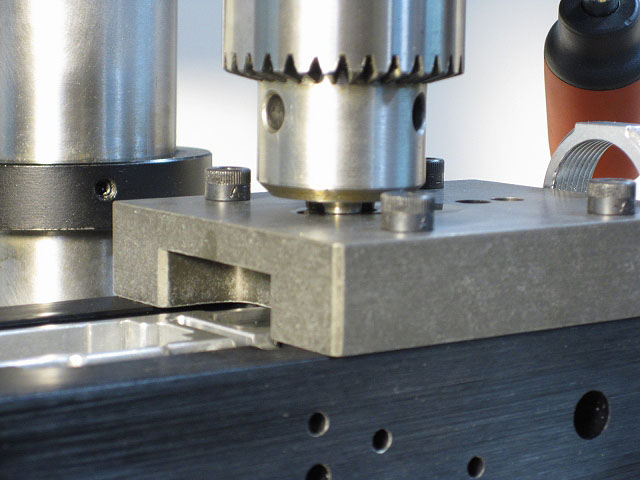
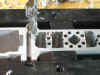
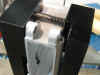
Now
make sure the adapter plate is centered
over the jig. Measure both sides
to make sure they are the same distance
and tighten the bolts to around
10 ft-lbs of torque...
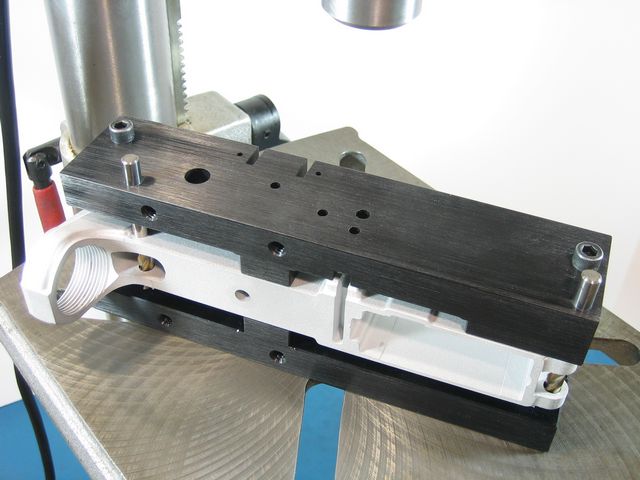
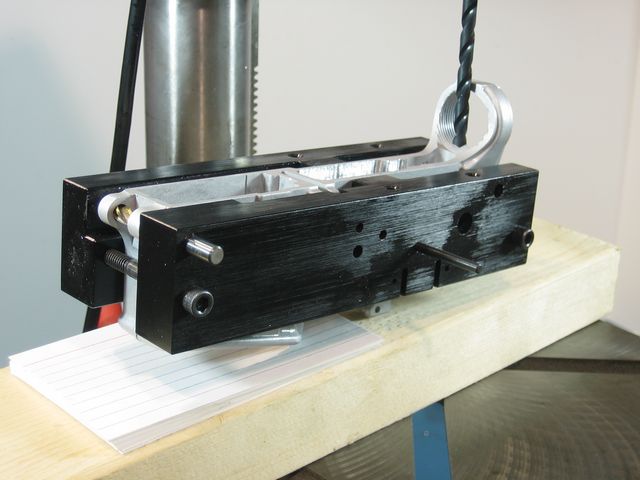
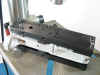
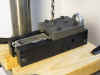
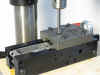
Next
I got the drill press ready. Since
the the jig assembly will be moved back
and forth several times, it's best to
clamp some 2x4's to the table for
everything to ride on. I used
rough 2x4's, but I would recommend using
some wood that has been planed to make
sure both pieces of wood is exactly the
same thickness. Even using rough
2x4's I was able to get pretty nice
results. The distance between the
boards need to be 1.900 and centered
under the drill chuck so you can travel equal distance forward and
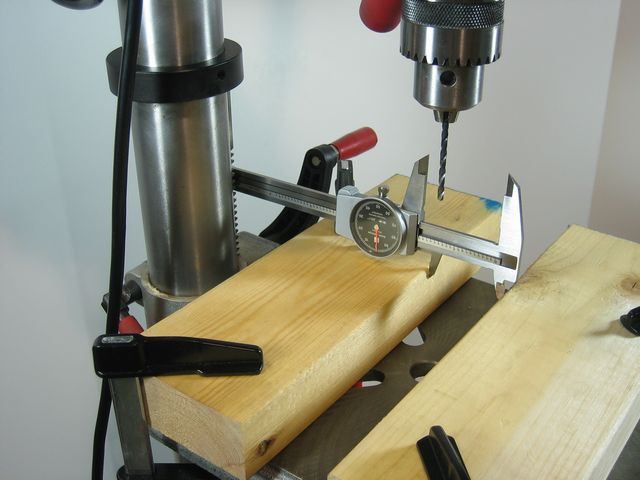
back. Here's a pic showing that...
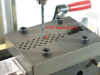
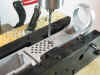
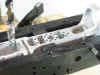
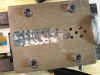
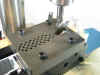
The
next step is to drill the (37) 1/8
holes. To make drilling the holes
easier, I only used the jig to spot
drill the hole locations, then I removed
the adapter to finish drilling the
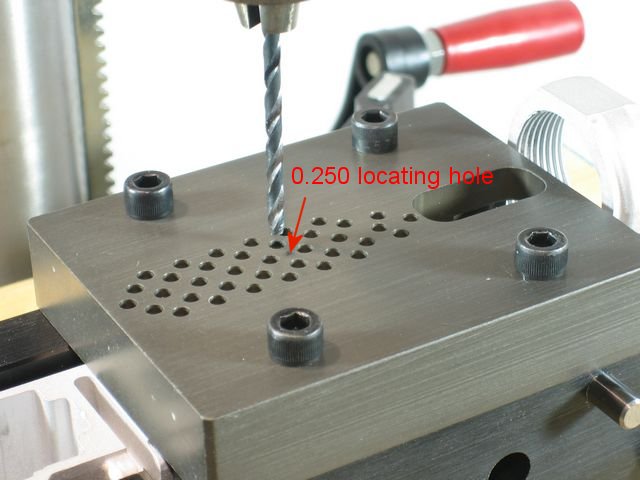
holes. On Kevin's 80% lowers he
adds a 0.250 diameter locating hole to
help him during his production
runs. Since (4) of the 1/8
diameter holes fall on the edge of this
0.250 hole, I drilled the (4) 1/8 holes
at least 0.500" deep. The
0.250 hole is only around 0.500 deep, so
once you drill the 1/8 hole at least
that deep, it shouldn't try to walk on
you anymore. I would recommend
drilling the full 1.249 depth to avoid
any possible problems later on. Here's a pic showing
where the 0.250 locating falls and a pic
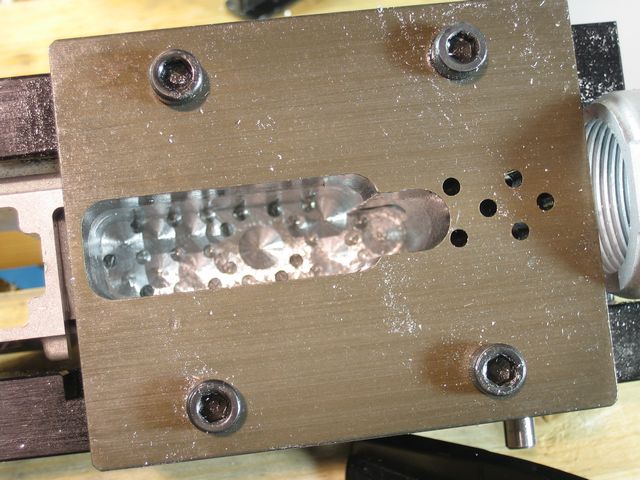
after the holes were drilled...
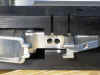
After
I had all the 1/8 holes spot drilled, I
removed the drilling adapter
plate. Here's what it looks
like...
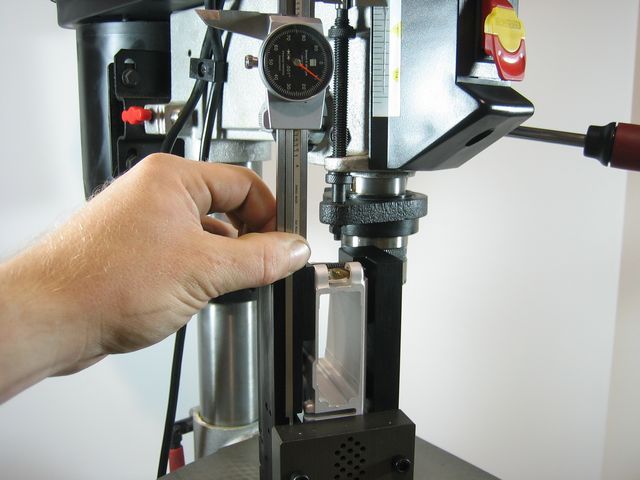
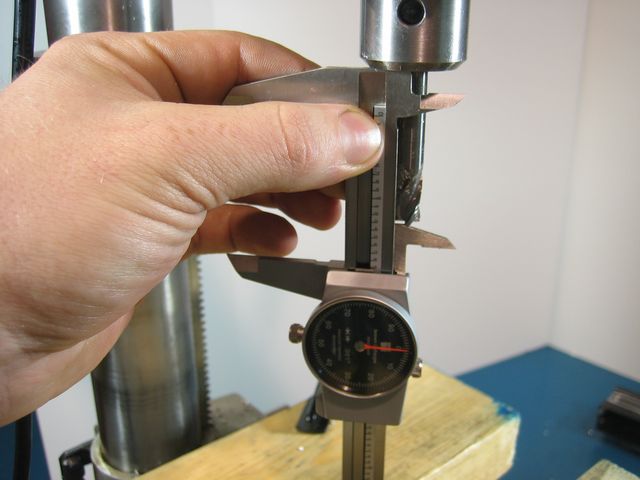
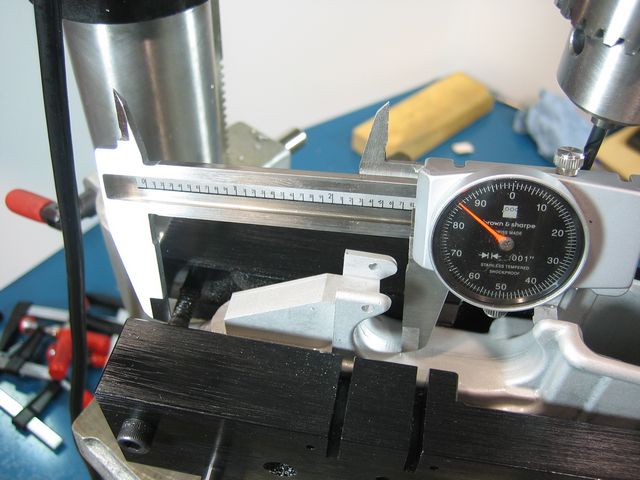
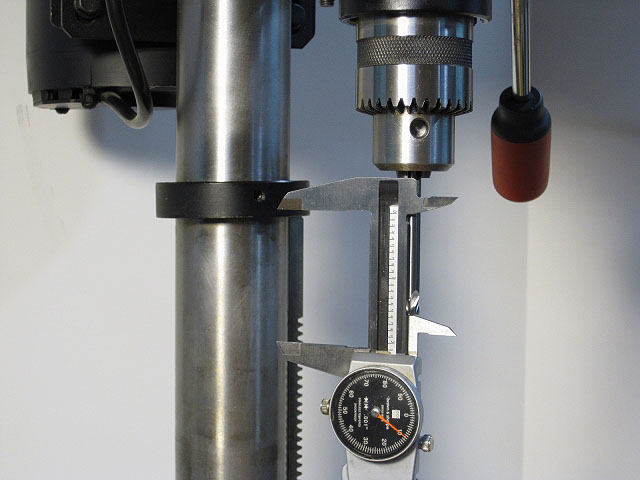
Now
I needed to drill the 1/8 diameter holes
to 1.249 deep. To do this I locked
the spindle in while the drill was on
top of the receiver and then I used my
calipers to mark where I needed to stop
the drill press. You can also
reference the original tutorial on how I
set the stop nut to the correct
depth. Since I didn't care if the
receiver had little dimples on the
bottom of the fire control pocket, I
just used the scale on the drill
press. Here's when I was setting
drill depth...
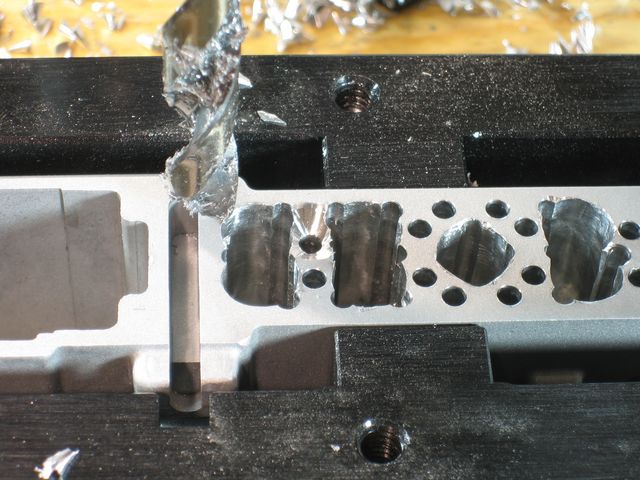
The
following pics showed how I progressed
through drilling the 1/8 holes...
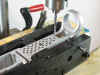
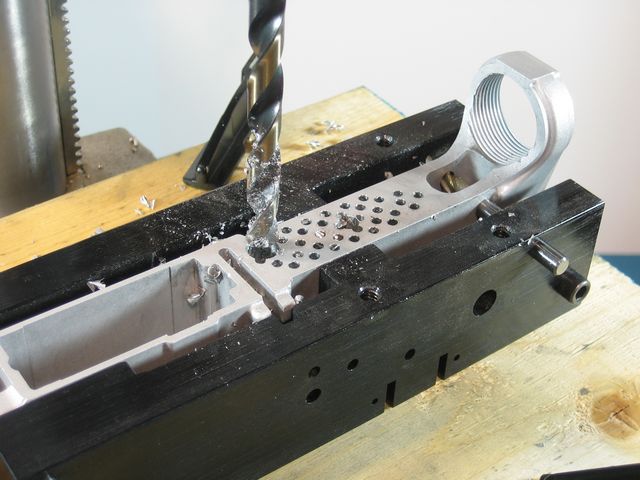
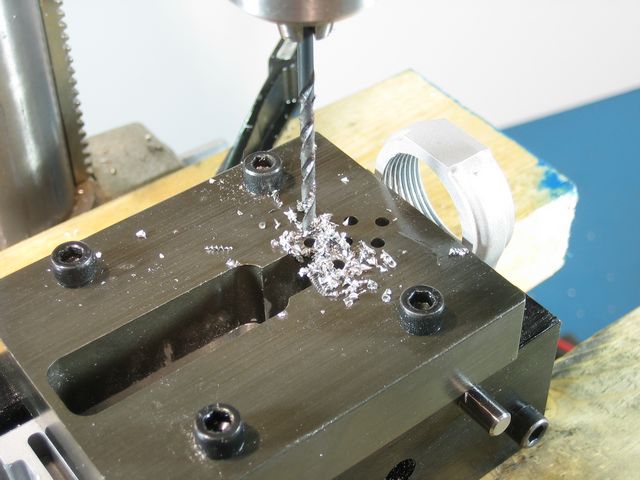
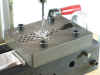
Next
I changed drills to the 3/8 drill.
This drill will remove the meat of the
fire control pocket. I set the depth of the 3/8 drill to
1.249 like I did with the 1/8
drill. I referenced Fig. 1 for the
locations of the 3/8 drill and proceeded
with the drilling. ...
When
you start drilling the next 3/8 hole next to the
you just finished drilling, make
sure you have a firm grip on the jig
assembly. The drill will try to
walk on you, but if you go really slow
you can force the 3/8 drill to stay
centered on the 1/8 drilled hole.
I stopped drilling half way through to
take a quick pic...

I
found it to be a little easier if you
skip a row of 3/8 holes and start with a
fresh hole. This way when you go
back and drill the remaining holes,
there will be equal force on both sides
of the drill. Here's what I'm
talking about...
I
just barely started drilling this hole
and I wanted to stop and take a quick
pic. You can see how there is
equal force on both sides of the
drill...
And
here's a pic after that hole was
drilled...
The
next hole can be kinda tricky, but if
you go slow and keep a firm grip on the
jig assembly you shouldn't have any
problems. If the drill starts to
walk off position, just slow down and
keep a firm grip on the jig. With
enough patients you can actually force
the drill back to the center of the 1/8
hole. Here's what it should look
like...
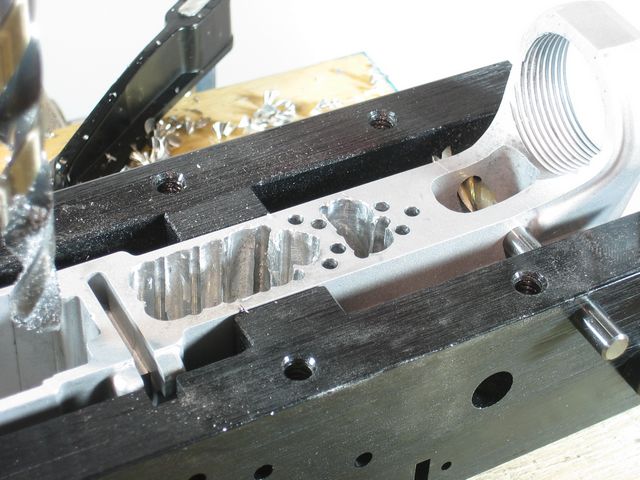
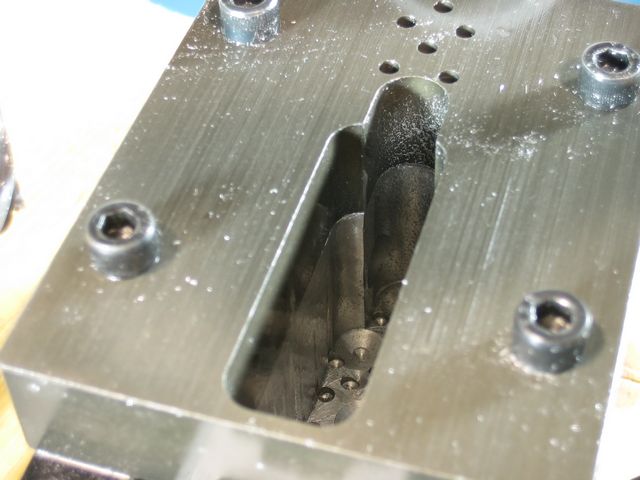
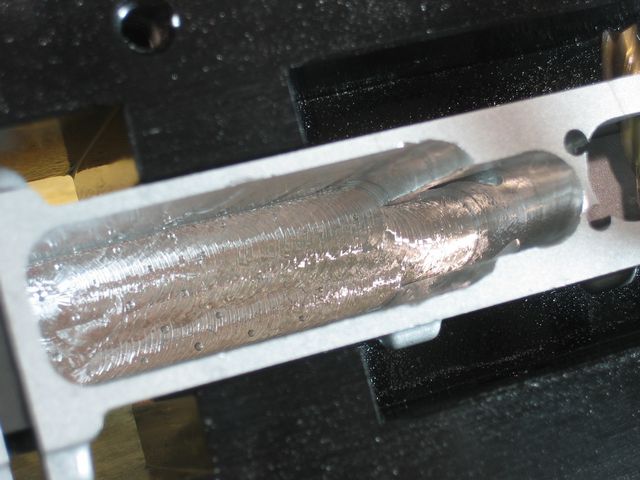
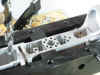
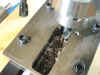
After
you progress through all the 3/8 hole
locations, the fire control pocket
should start taking shape. Don't
worry if the drill walks off position
too much, you will be able to clean it
up with the endmill. But the
better job you do drilling, the easier
the milling job will be. Here's a
pic after the 3/8 holes were drilled and
the one 7/16 hole (reference Fig. 1 for
hole location)...
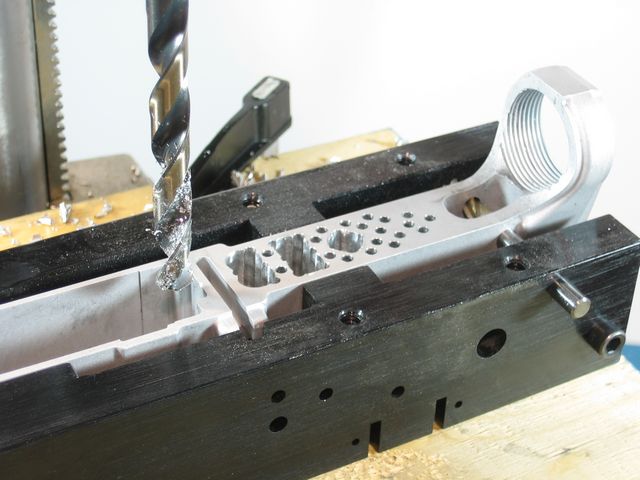
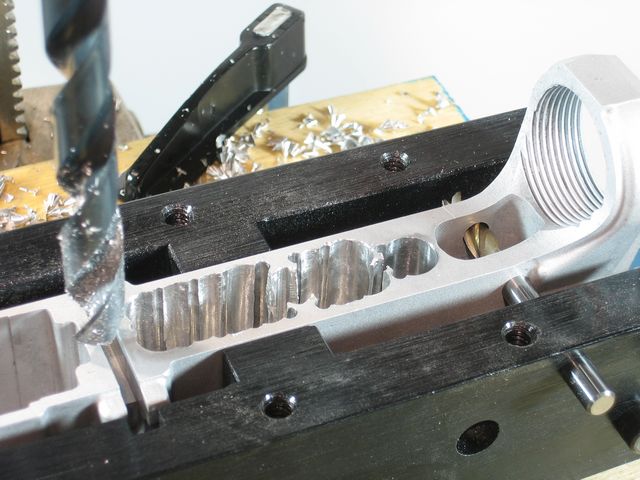
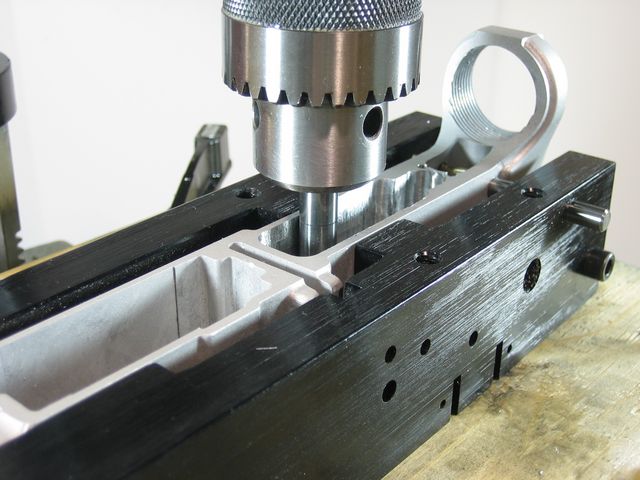
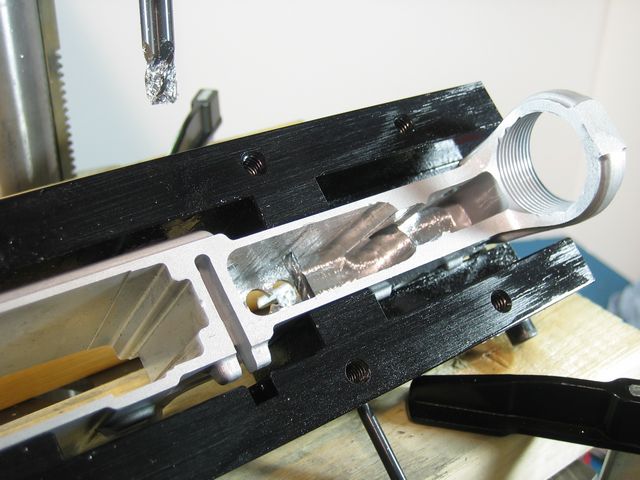
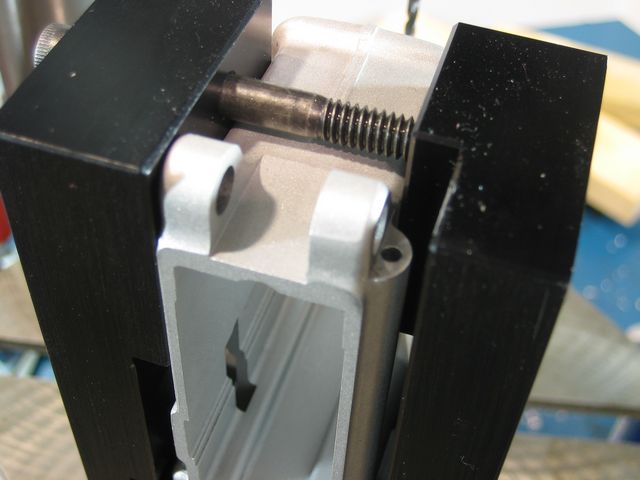
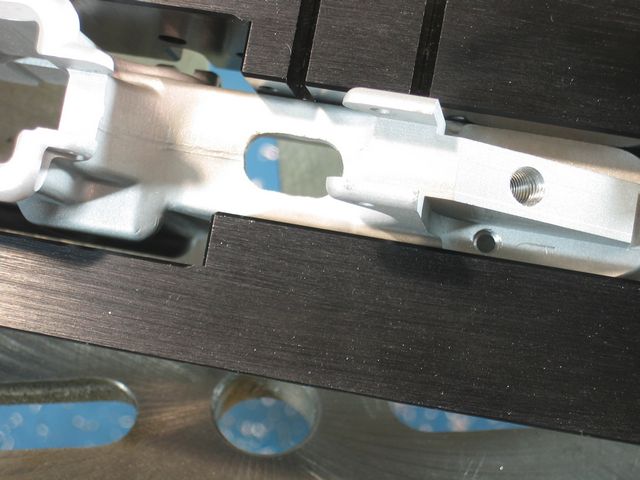
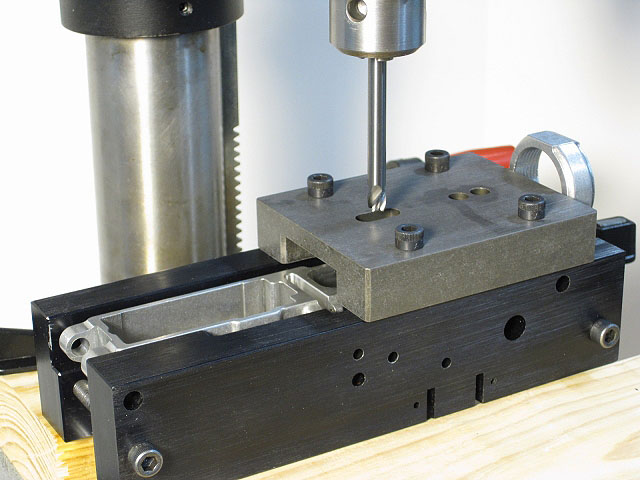
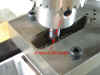
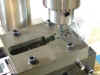
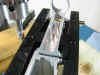
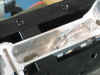
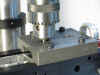
Now
it's time to use the drill press as a
mill. Attach the milling adapter
plate as described above. Put the
3/8 solid carbide endmill in the drill
chuck and set the length to 1.900 from
the bottom of the chuck to the bottom of
the endmill...

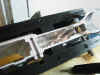
With
the spindle turned off, plunge the 3/8
endmill into the pocket of the milling
adapter. I actually cranked the
table up to the endmill instead of bring
the endmill down to the work
piece. I think having the spindle completely
inside the drill press makes
it a little more rigid. MAKE SURE
there is at least 0.250 length of shank
of the endmill touching the side wall of
the adapter. If you fail to do
this, the cutting flutes of the endmill
could cut into the adapter and ruin the
adapter. Again MAKE SURE there is
at least 0.250" of the shank of the
endmill touching the wall of the
adapter!!! Like in this pic...
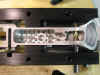
Turn
the spindle on and slowly move the jig
assembly up to the endmill. You
need to conventional mill the
pocket. I don't have to really
explain the difference between
conventional and climb milling here
because you simply won't be able to
climb mill the pocket because you won't
be able to keep it steady.
Basically you need to go clockwise
inside the pocket. Milling the
pocket is a whole lot easier than what
you might think. As long as you
take shallow cuts of about 0.025 deep
each time. The first cut may have
to go a little deeper to keep the
endmill from cutting into the side of the
adapter, but other than that, it
actually goes really smoothly.
Make sure you use plenty of WD-40 or
some other cutting fluid to keep the
chips off the endmill so you aren't
re-cutting the chips. Here what it
looked like after the first step...
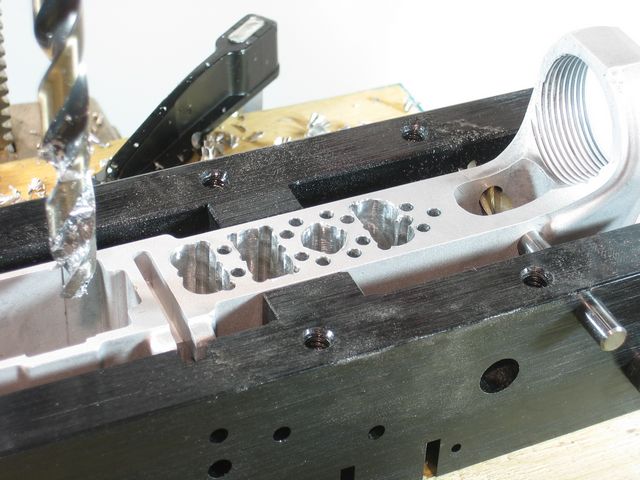
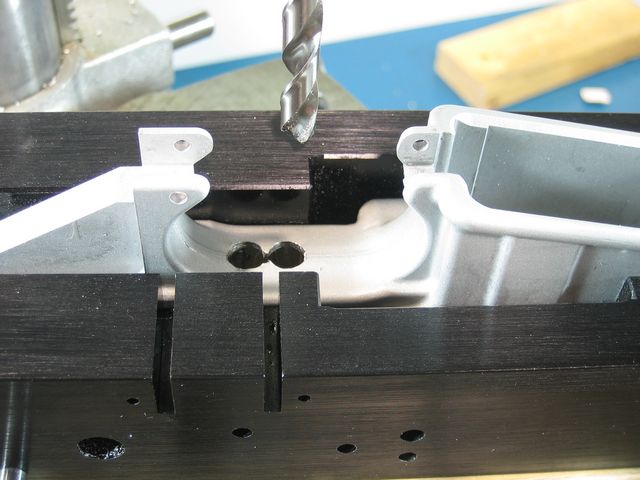
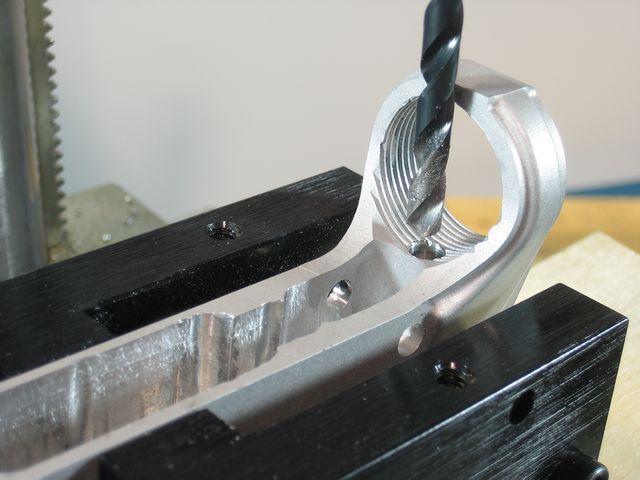
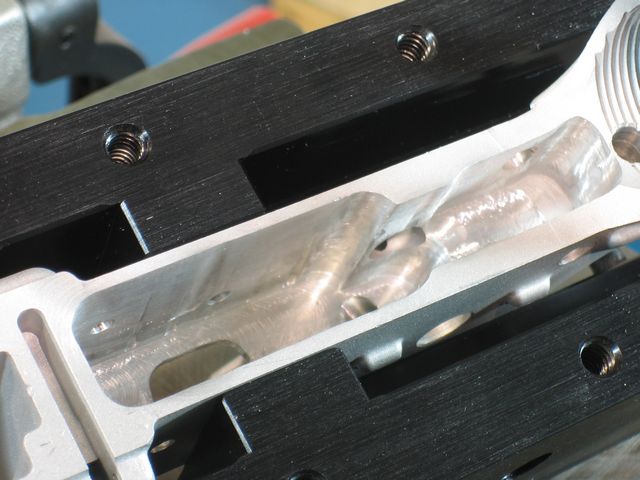
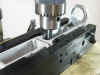
Keep
milling down as deep as you can until
the chuck almost touches the top of the adapter
plate. Here's what it should look
like...
Now
before I removed the milling adapter
plate, I went ahead and drilled a couple
of the 1/8 holes in the shelf area of
the pocket. These holes need to be
0.630 deep. Since the rear shelf
is basically complete, a quick way of setting
the depth of this hole is to plunge in
the hole shown and mark the location on
the drill press scale...
Then
just drill the following two
holes...

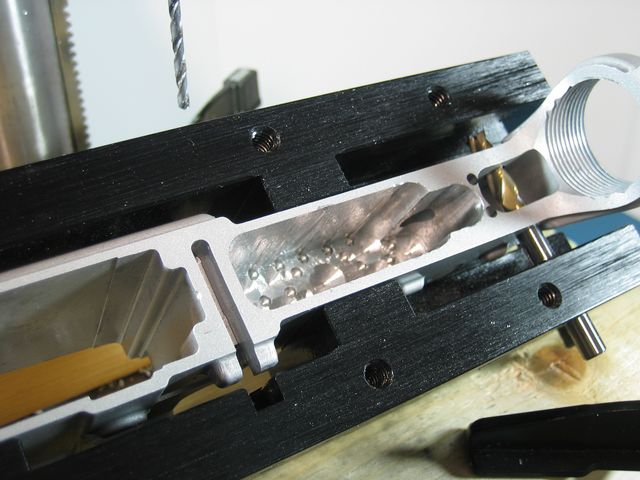
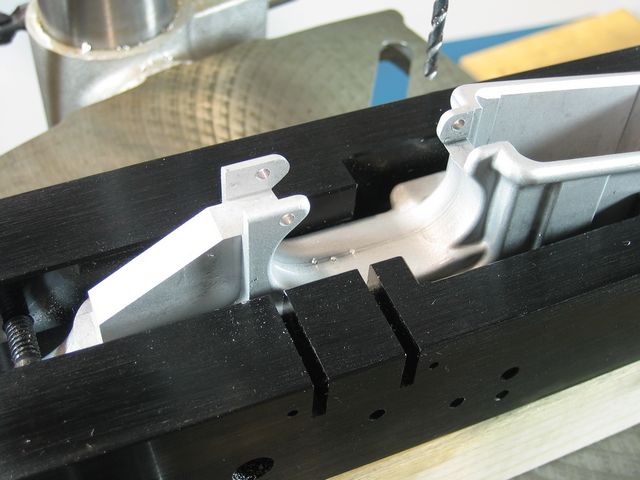
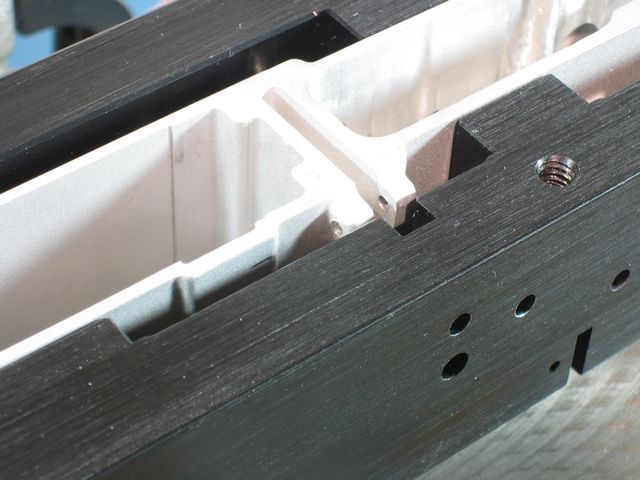
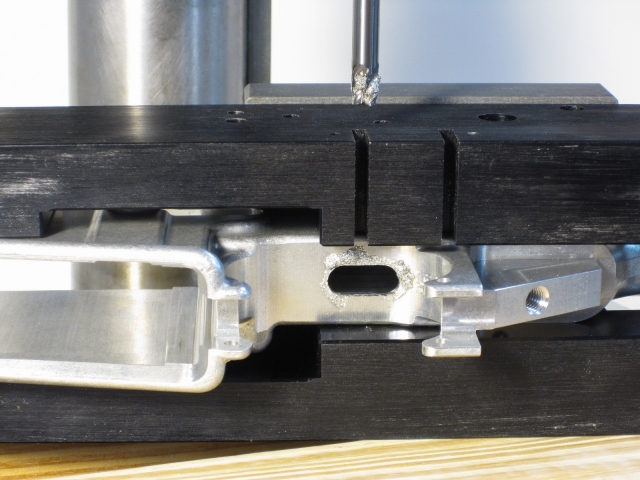
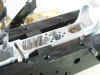
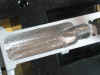
Next
I removed the adapter plate to see how
it looked so far. Not too bad at
all considering it was all done on a
drill press...
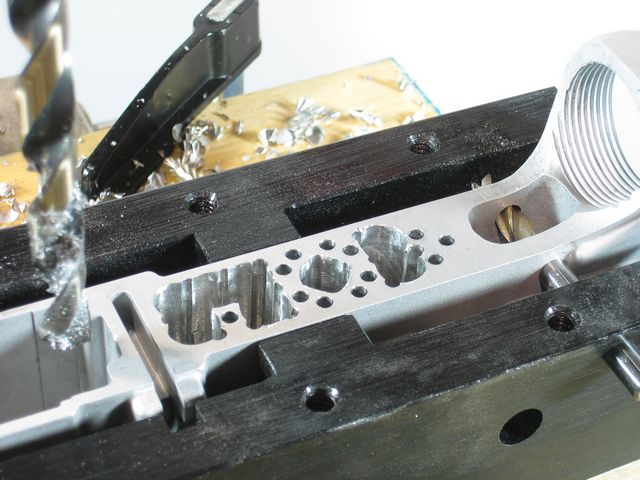
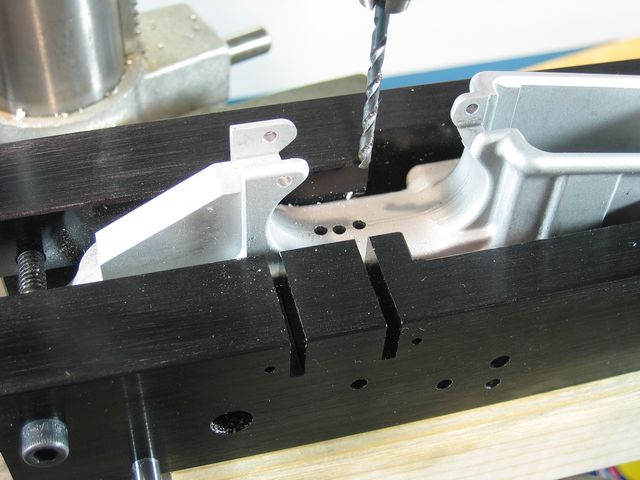
Since
the endmill isn't long enough to reach
down inside the pocket with the adapter
plate attached, you have to
finish the bottom of the pocket using
what you just milled as the guide.
Make sure you turn off the spindle each
time you plunge the endmill into the
bottom of the pocket. Take small
cuts and keep measuring the depth until
you finally mill a depth of 1.249.
If you go slow and keep a firm grip on
the jig assembly you should end up with
something like this...
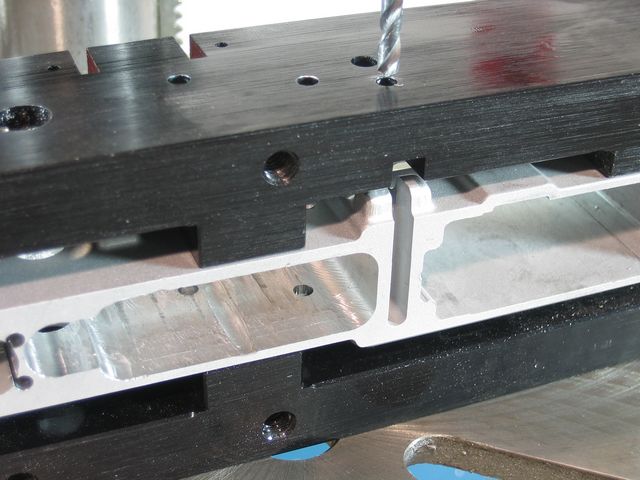
Now
I kinda switched gears and finished up a
few of the other features. I
drilled the trigger and hammer pin holes
as well as the bolt catch plunger
hole. Visit the original tutorial
for details on these holes...
(See
the trigger slot adapter plate tutorial
below if you don't want to use the
following method) Now
I scribed some lines where the trigger
slot should be. The scribe lines
come from the back side of the bolt as
show in the pic below. The
locations are as follows: 2.785;
2.969; 3.153...
Next
I measured the width of the receiver,
divided that by half and set my calipers
to that number and scribed a line from
the inside edge of the jig to where the
center of the trigger slot should
be. Then I used a transfer punch
to center mark the hole locations...
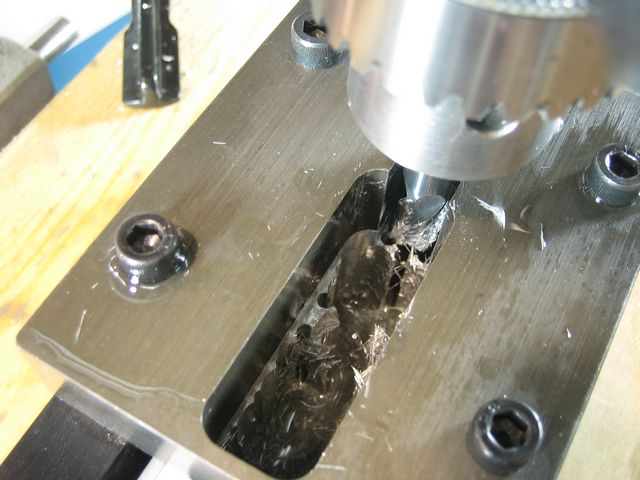
Then
I drilled the center marked locations
with a 1/8 drill. and then the two end
holes with a 5/16 drill. I got in
a hurry while drilling these holes so
they aren't in the exact location, but
it's not a big deal because it's only a
slot for the trigger to fit through...
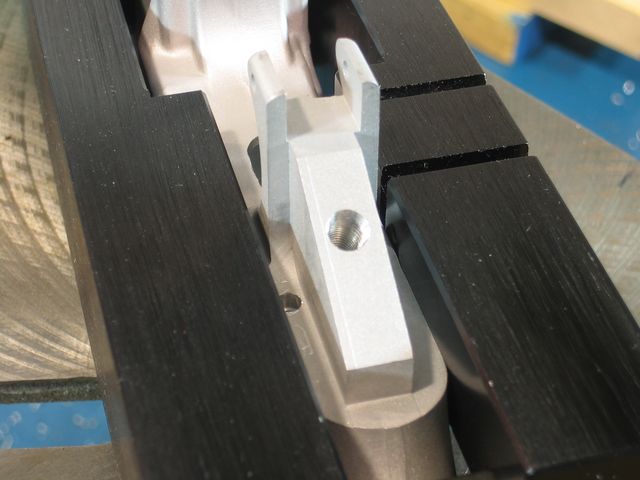
Now
I reattached the drilling adapter plate
to mill the shelf in the pocket.
Again follow the instructions above for
attaching the adapter plate. I
couldn't use the worn out 1/4 endmill in
this rear take down pin hole since that
is where I'll be milling, so I just ran
the 5/32 drill through trigger hole to
make sure everything stays lined up.
Here's what it looks like before...
Mill
small steps like before to a depth
of 0.630 and it looks like this when you
are done...
When
you remove the drilling adapter plate
you will notice two ridges where the
endmill couldn't cut. It's not a
big deal. You can remove these
ridges with a dremel tool, or just
simply leave them in there because they
won't hurt anything. If you are
planning on using a RDIAS then these
areas will probably need to be smoothed
down...
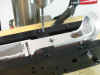
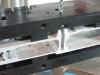
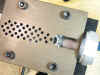
Next,
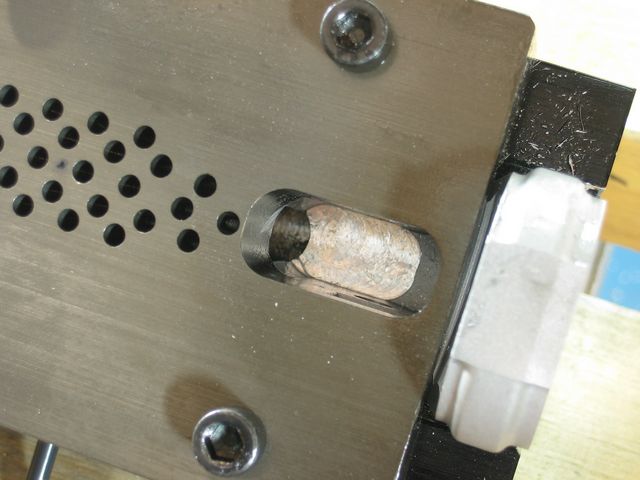
I setup and drilled the buffer retaining
hole. I didn't have a block
that was exactly 0.220 thick so I just
stacked up some index cards and placed them
under the receiver. I completely
eye balled this hole. I just made
sure it was in the center of the
receiver and right up against the buffer
tower. It's not critical at all...

Then
I setup and drilled the front take down
pin detent hole, pistol grip hole, bolt
catch roll pin hole, and selector detent
hole. Visit the original tutorial
for details on these holes...
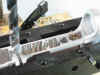
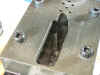
I
used a drimel tool with a sanding stone
and a sanding band to finish out the
trigger slot and I also smooth down the
inside of the fire control pocket even
though it wasn't a must. Here's
what it looks like...

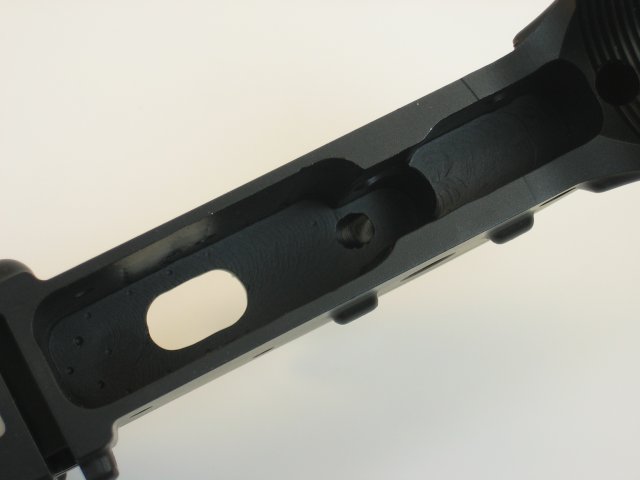
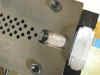
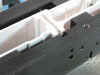
Only
thing left is to black anodize the lower
and she'll be ready to go...
I
black anodized the lower and it came out
looking really nice. I don't
normally toot my own horn, but I'm
actually really happy with the way this
lower came out considering the fire
control pocket was solid before I
started. Below are some close up
pics of the fire control pocket...
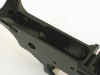
Click
on the pic below to see the final
product...

V.
Conclusion:
In my opinion finishing Kevin's new 80%
AR15 lower receivers are easier than his
original lowers. Mostly because
you don't have to deal with the buffer
tube hole. Using the method above
by drilling lots of holes in the fire
control pocket to remove most of the
material and then finishing it out with
a endmill is a whole lot easier than
what I thought it'd be. You just
have to make sure you take small cuts
and use plenty of cutting
fluid.
I may have skimmed over some of the
details in certain areas, but those
details should be covered in the
original tutorial. (fire control pocket
milled out)
All information contained in this tutorial is for educational purposes.
TRIGGER
SLOT TUTORIAL
By: Justin / jwh02017
Rev. Date: 09/08/2012
To
make life a little easier I have
designed and tested a new trigger slot
adapter plate. This new adapter
isn't absolutely necessary but it will
help eliminate any errors while cutting
the trigger slot in the fire control
pocket. If you've completed the
tutorial above then you won't need
anything else besides a letter L
drill.
The
first step is to secure the trigger
adapter plate to the drill jig just like
you did with the milling adapter plates
in the tutorial above (use the same 4
bolts that came with the milling adapter
kit). Make sure you orientate the
plate correctly by insuring the 2 holes
are closest to the mag well. Using the
same method as in the tutorial above,
load the letter L drill in the
chuck. It should look like this...
Add
a little oil to the drill and drill
through the receiver. You should
now have 2 holes where the trigger slot
should be...
Next
remove the letter L drill and put the
included 1/4 carbide endmill into the
chuck. Set the length from the
bottom of the chuck to the bottom of the
endmill to 2.110"...
Now
flip flop the trigger slot adapter plate
so the slot in the plate is closest to
the mag well. Again, use the same
method as in the tutorial above to
located and secure the plate to the
drill jig...
Lower
the 1/4" carbide endmill down into
the jig so bottom of the endmill is
touching the bottom of the fire control
pocket...
Again
using the same method as in the tutorial
above, work the endmill down into the
metal in steps no deeper than
0.025". Guide the endmill
around the trigger slot adapter plate in
a clockwise motion. By the time
you cut all the way through the receiver
the chuck will almost be touching the
adapter plate...

Lastly,
raise the endmill out of the adapter
plate and you are finished...