Finishing An AR-15 80% Lower Receiver
-
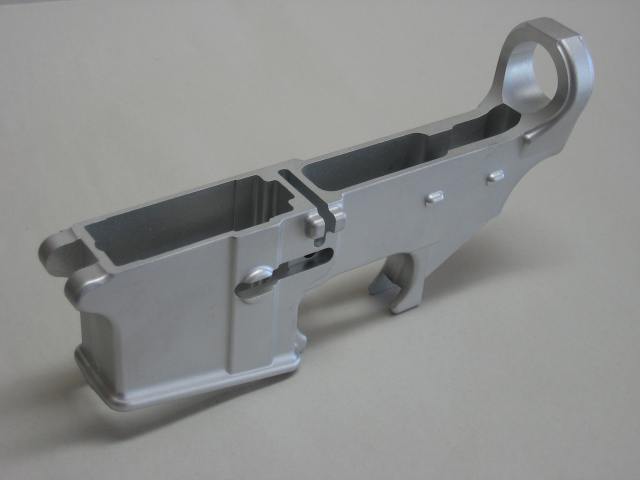
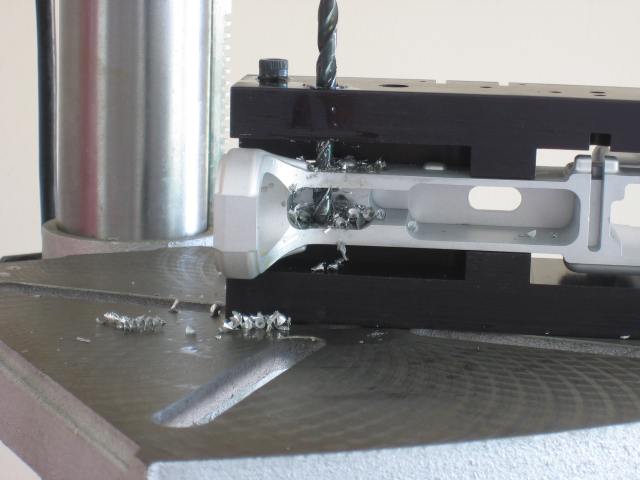
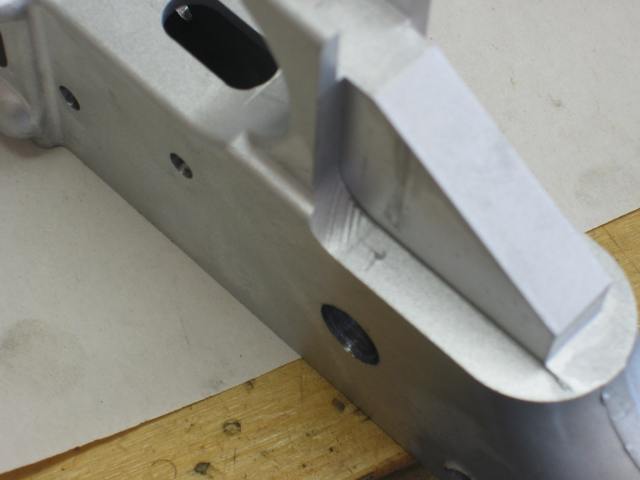
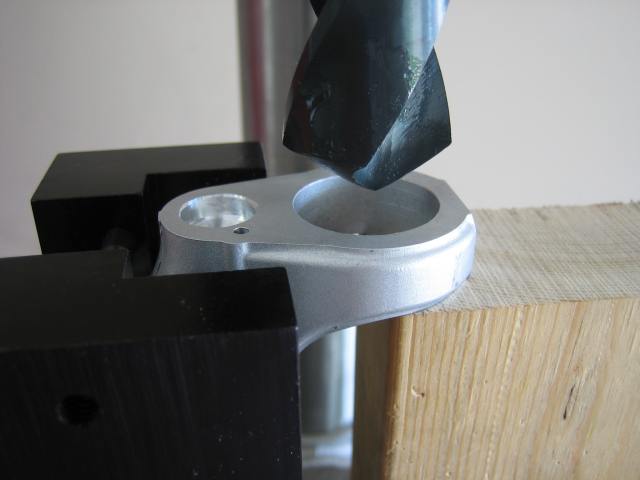
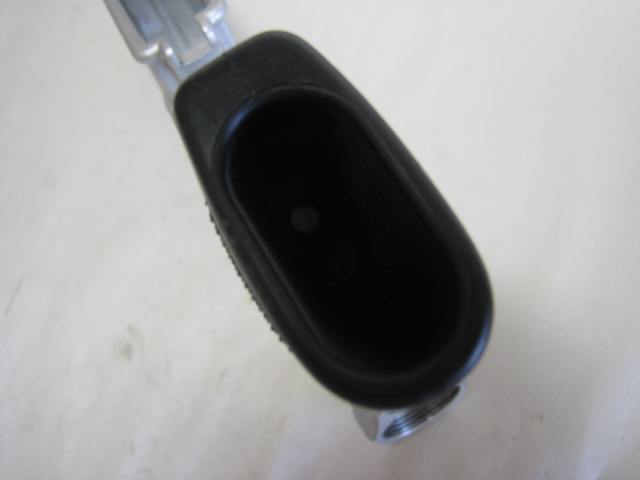
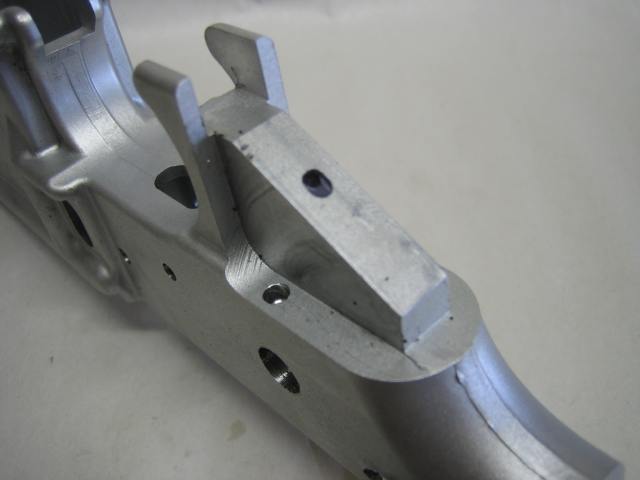
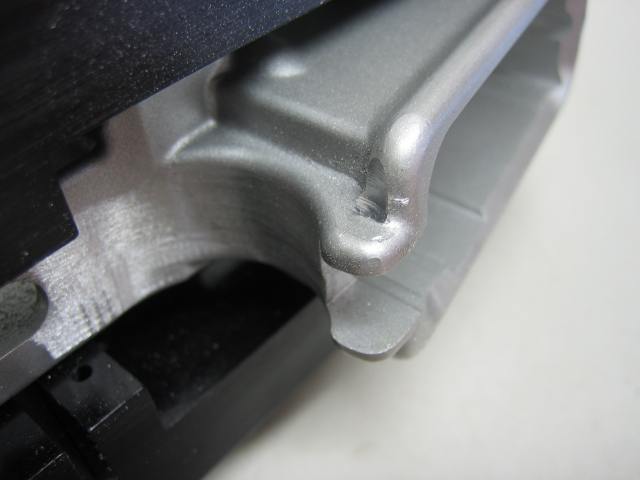
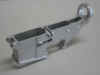
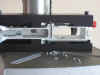
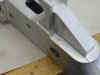
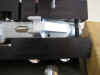
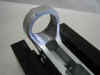
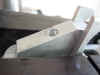
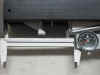
Fire control pocket milled out -
By: Justin / jwh02017
Rev. Date: 6/5/07
***
NOTE: This tutorial uses Kevin's older
style 80% lowers ***
Outline:
I. Introduction
II. Tools Used
III. Diagram & Blueprint
IV. Tutorial
V. Conclusion
I.
Introduction:
In this tutorial I will demonstrate how easy it is to complete an 80% AR15 lower receiver using the CNC Gunsmithing jig. www.cncguns.com You may have seen some of the other projects I’ve completed using CNC machining centers. Although viewing those projects is neat, it’s usually not possible for the average guy to use CNC equipment to complete his lower. So that is why I want to show how somebody can complete an AR15 80% lower with typical tools usually found in their garage. There are several ways to complete an 80% lower. So what I demonstrate here may not be the way you finish your 80%’er, but it’s what I thought was the easiest at the time with the tools I had access to in my garage. The optional items in the Tools Used list
below are items that make the job easier, but they aren’t required.
II.
Tools Used:
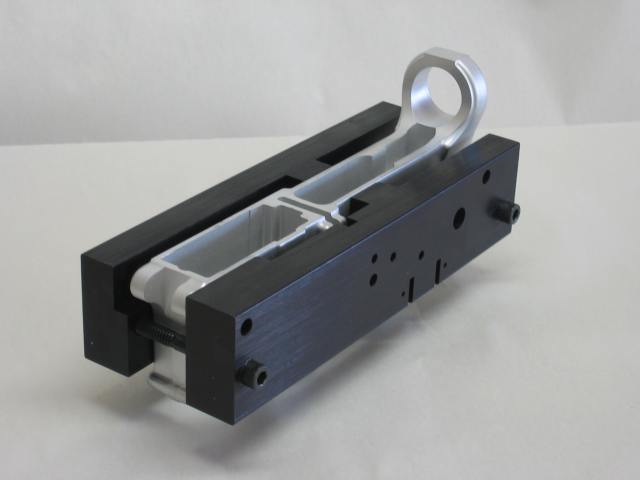
- CNC Gunsmithing Drill Jig
- 80% AR15 Lower Receiver
- 12” Craftsman Drill Press - 5 speeds (540-3600 RPM)
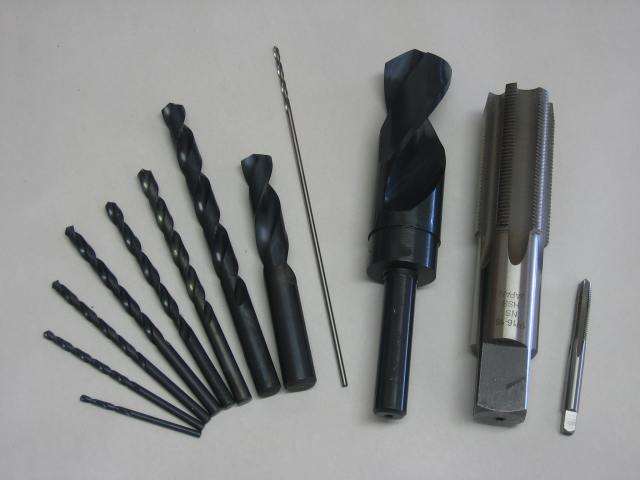
- Drills & Taps:
- (A) 1/4 Drill
- (B) 13/64 Drill
- (C) 1/8 Drill
- (D) 5/32 Drill
- (E) 3/8 Drill
- (F) #40 Drill
- (G) 1/2 Drill
- (H) 1 1/8 Drill
- (I) #42 Aircraft Extension Drill
- (J) #3 Drill
- (K) 1/4 - 28 Tap
- (L) 1 3/16 - 16 Tap
- 3/16 Allen Hex Wrench
- Cutting Fluid (WD-40)
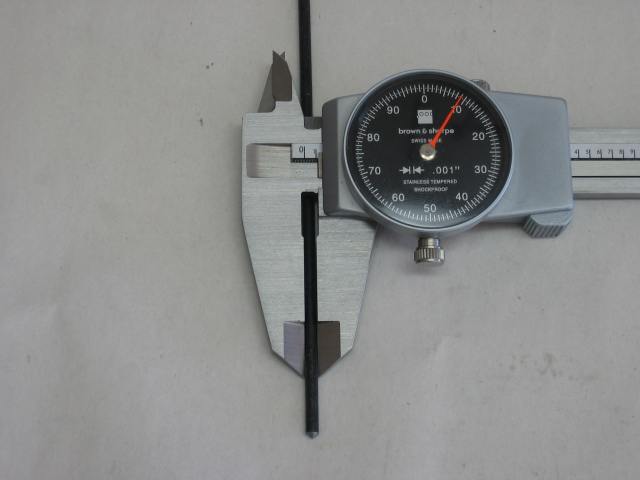
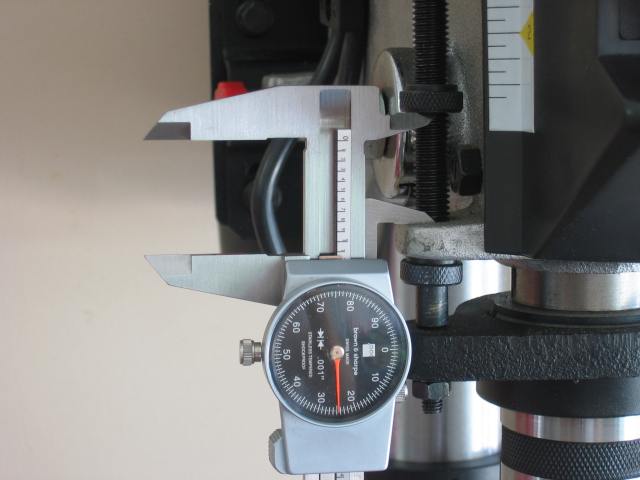
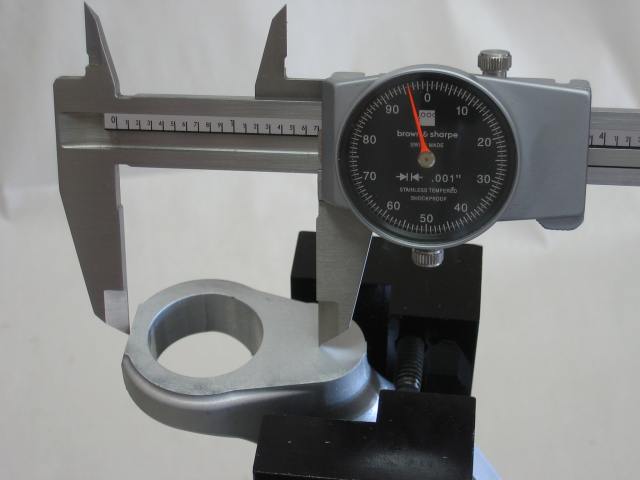
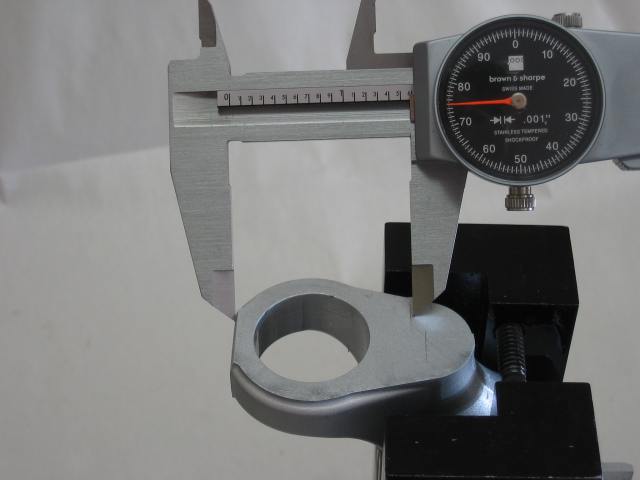
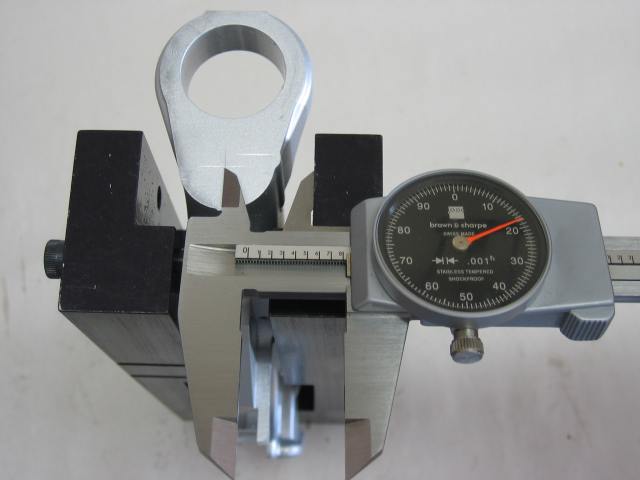
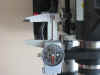
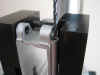
- Calipers
(Optional Items)
- Transfer Punch Set
- 2x4 piece of wood - 7.25” long
- 2x4 piece of wood - 2.50” tall
- Columbian Clamp - 15” long
- Irwin Quick Grip - 8" & 12”
- Bubble Level
- Sharpie Marker
- Dremel Tool w/ Grinding Stone & Sanding Bands
III.
Diagram & Blueprint:
Click
on the pics below to download pdf files
of the Hole
Size Diagram and AR15 blueprint.
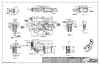
The
diagram will show you which size drill
or tap to use in each location.
The blueprint can be used for reference
during the project.
IV.
Tutorial:
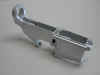
I started with an 80% AR15 lower receiver from Kevin (Email:
audibk@yahoo.com) He sells the nicest
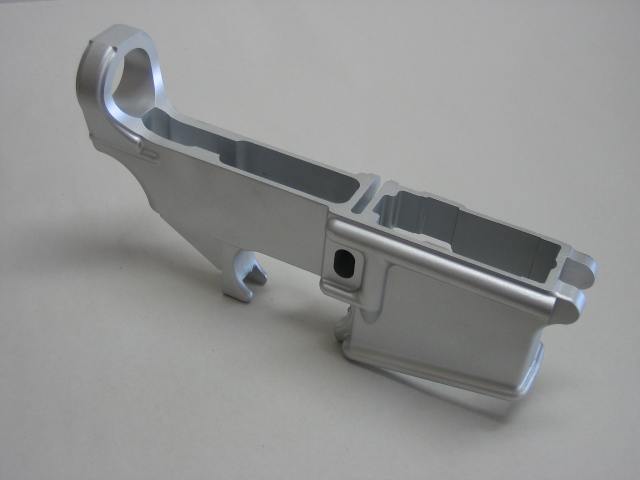
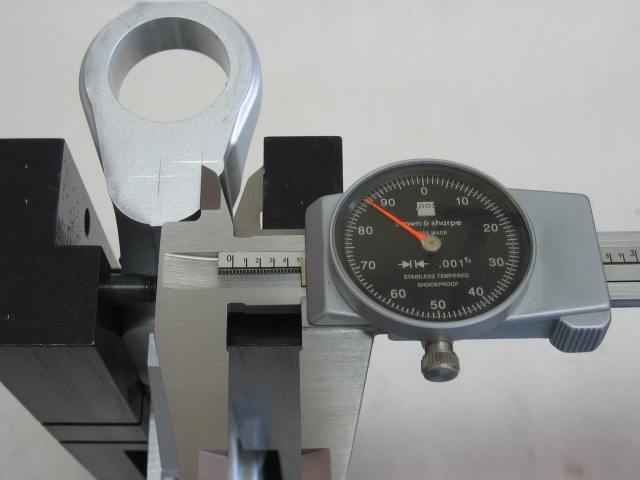
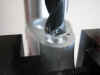
80% forged receivers I’ve ever seen. I bead blasted the lower before I started this tutorial to give a better contrast of where cuts will be made. Here are a couple pics to show you what I’ll be starting with…
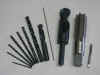
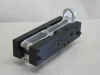
Below is a pic of the drills & taps I used. Depending on how you are planning on finishing your lower, you may or may not need all of these tools.
I used all new drills and taps to insure
every cut was precise. You don't
have to use new drills, you just need to
make sure they are good and sharp to
avoid any possible problems. The drill press was operated at the lowest spindle speed of 540 RPM’s throughout this project. I feel this spindle speed is safe for this type of manual work. Any higher RPM and stuff happens a lot quicker and that’s not always a good thing. For reference, an average spindle speed when I run the CNC machines is 10,000 RPM. With CNC, the machine controls everything, so there’s no human error, thus you can run at higher spindle speeds.
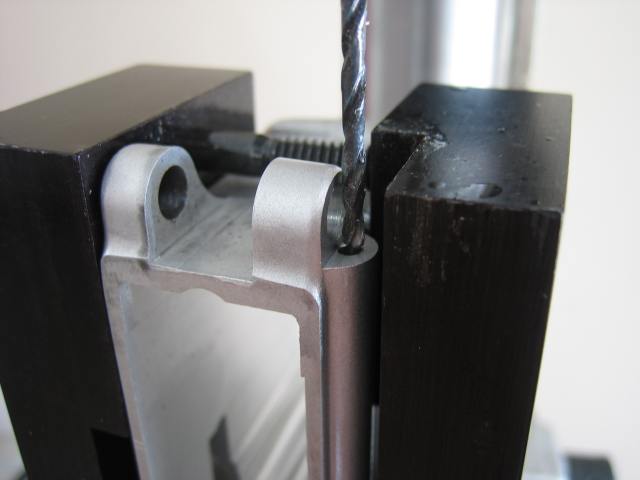
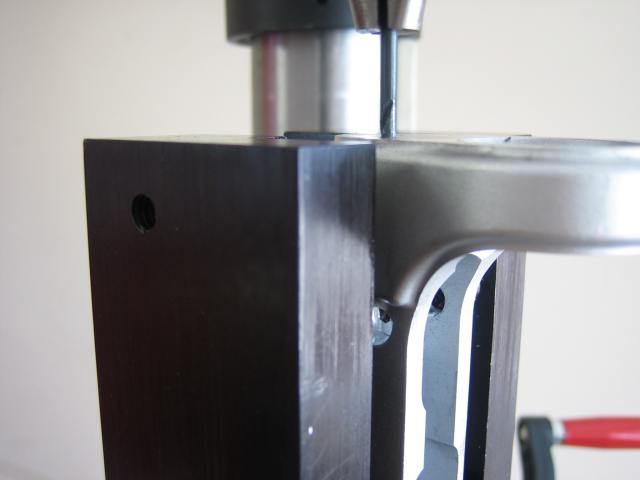
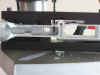
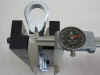
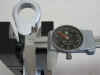
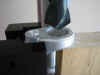
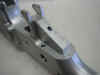
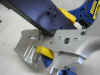
The first thing I done was aligned the receiver in the jig. To do this I turned the jig upside-down and set it on the edge of the drill press table. Then I took a flat object and made sure the back of the buffer tower was flush with the back of the jig. Once I was sure both surfaces were flush, I tightened the two
1/4-20 socket head cap screws to around
10 ft-lbs of torque. Here is a pic showing that…
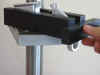
And below is what the receiver looks like aligned in the jig ready to be drilled…
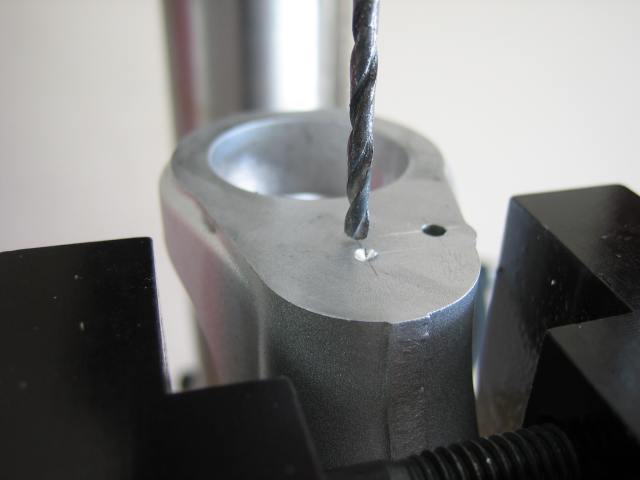
There is no set in stone rule as to which drills you must begin with. I decided to start with the (A) 1/4 drill. This drill is used for the front and rear take down pin holes. Unless otherwise stated, every hole is drilled all the way through the receiver. I applied cutting fluid to the drill before drilling each hole. Below is a pic of the rear take down pin hole being drilled…

Next I drilled the front take down pin hole…
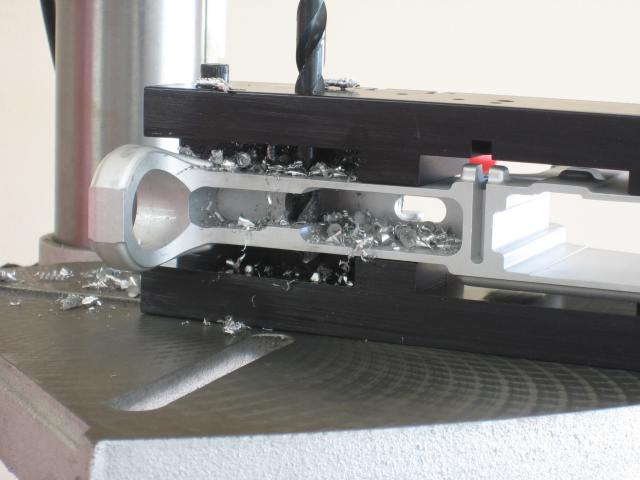
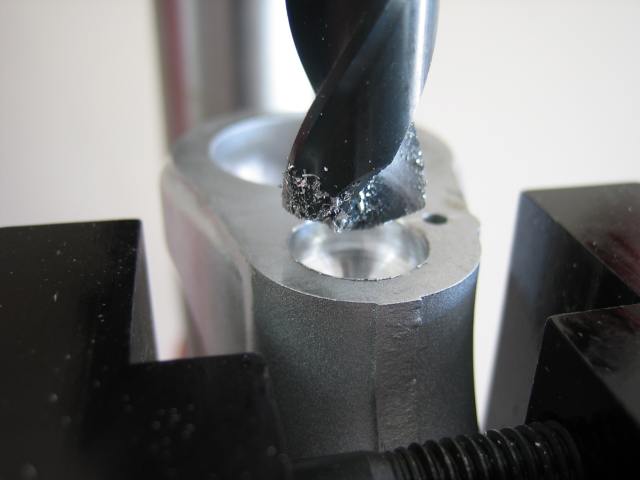
I decided to use the (E) 3/8 drill next. This drill is used for the safety selector switch hole. Below is a pic of this hole being drilled…
Next I used the (D) 5/32 drill. This drill is used for the hammer and trigger pins and also the bolt catch plunger hole. Below is a pic of the hammer pin hole being drilled…
Next I drilled the trigger pin hole…
Then I drilled the bolt catch plunger hole. This hole DOES NOT go all the way through the receiver. From the top surface of the jig, you need to drill down 1.500”. To accomplish this, I touched the drill off on the top surface of the jig and locked the spindle in that position…
Then I set the travel distance of the drill press to 1.500” while the drill bit was still touched off on top of the jig…
The next step was to drill the hole…
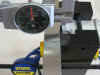
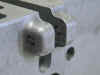
The hole for the magazine catch was already drilled when I received my 80% lower so I didn’t have to worry about drilling that hole. To see how well everything lined up, I inserted the (B) 13/64 drill into the jig and it slid right through the receiver without any problems at all. So I am confident the lower is in the exact location within the jig.
The next hole I decided to drill was the safety selector detent hole. This hole is a two-step process. It uses a (D) 5/32 drill for a depth of 0.188” and a (C) 1/8 drill all the way through the hole until you reach the 3/8 selector switch hole.
After the detent hole is drilled, it
should hit the center of the selector
switch hole. The location of this hole is not extremely critical, so I just scribed a couple lines, punched the hole location and drilled the hole. To scribe the location lines, you’ll need an X and Y measurement, and then you drill where the two lines cross. The first line I scribed was the distance from the back of the buffer tower to the
center of where the safety selector
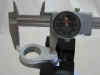
detent hole will be. I set the jig on the drill press table with the buffer tower facing down, then took my calipers and measured up 1.931” and made a scribe line.
Here’s a pic showing that…
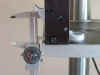
In order to get the next scribe line I had to remove the receiver from the jig, but it’s not a big deal because it’s easy to re-align the receive in the jig. I scribed a line that was 0.748” from the left side of the receiver to the hole location…

Now there is an X and Y scribe line and you can simply drill where these two lines cross. But to make the job easier I decided to use a transfer punch to make a center mark where the location should be. With this center mark it will give the drill point a place to start. I used a 0.216” diameter transfer punch…
You can use a smaller diameter transfer punch, but with the 0.216” you can set it up against the wall where the pistol grip will slide on. So in theory, you really don’t need the 0.748” scribe line if you use the 0.216” diameter punch. Here is a pic showing the center mark being punched…
And here’s a pic showing the center mark…
As I mentioned before, this detent hole is a two-step process. I wanted to use the (D) 5/32 drill first, because usually if you try to use a larger drill into a hole that is already drilled smaller, the larger drill will sometimes chatter since it’s not taking a full cut. So with the (D) 5/32 drill in the chuck, I locked in the spindle with the drill touching the center mark…
Then I set the drill depth to 0.188”
and drilled the hole…
Next I put the (C) 1/8 drill in the chuck and drilled through the hole until I reached the 3/8 selector hole…
And below is a pic showing the completed safety selector detent hole drilled…
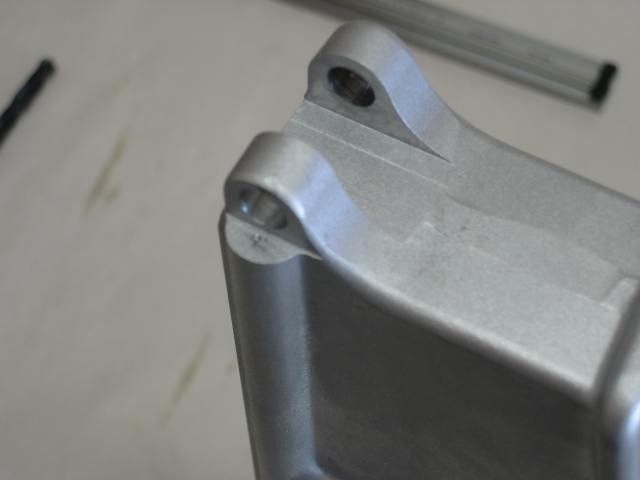
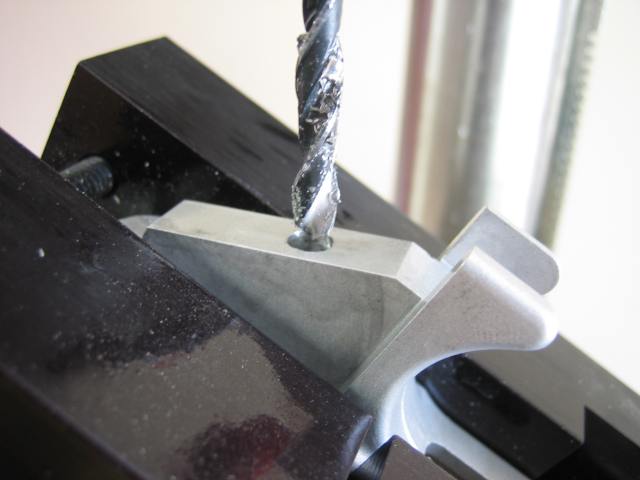
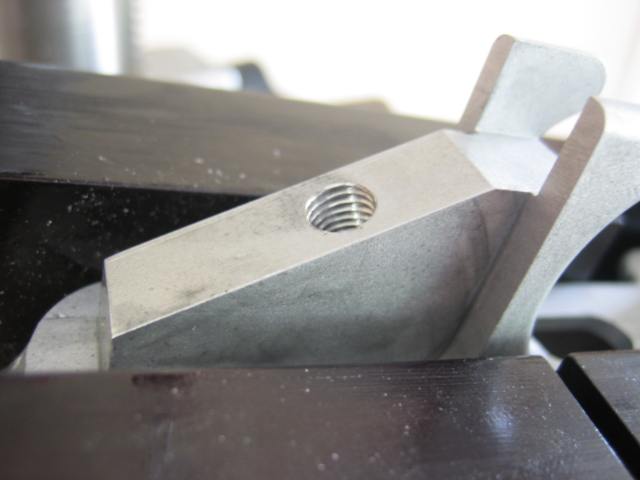
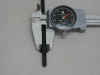
The next hole I decided to drill was the front take down pin detent hole. I used a (F) #40 drill for this hole. It’s a little bigger than what is called out on the blueprint, but in my experience I would rather have this hole a hair bigger because the last thing you want is the spring or detent getting stuck in this blind hole. Like the previous hole drilled, the location of this detent hole isn’t critical either, so I used the two-line scribe method again. I clamped a flat surface to the top plane of the jig and then scribed a line at 0.250”…
Instead of scribing the other line, I decided to use a 0.109” diameter transfer punch and set it against the take down pin lug…
With the transfer punch against the lug and on the 0.250” scribe line, I made the center mark…
The drill depth of this detent hole is 1.125” from the center mark surface. Again I locked the spindle in with the (F) #40 drill touching the center marked surface and set the drill depth to 1.125”…
When drilling this hole, make sure you go SLOW, take small pecks, and use plenty of cutting fluid. If you go too fast, it would be easy to break this small drill off in that deep hole. You also want to make sure the chips are cleaned off the drill every time you take the drill back into the hole. If you don’t remove the chips, they will get compacted in the hole and cause the drill to break or
walk off position. Here is a pic after the hole is drilled…
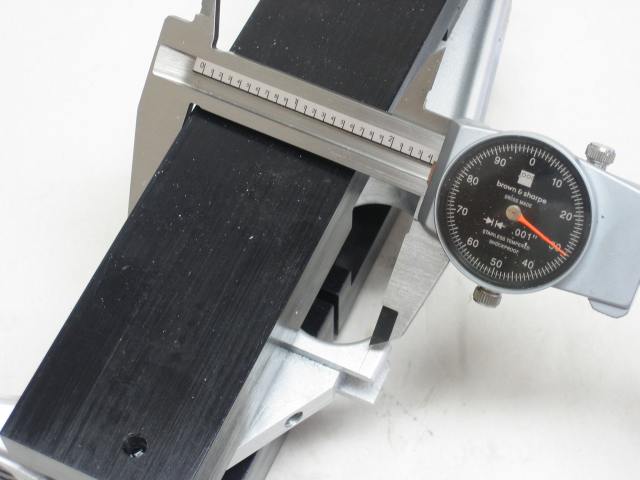
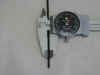
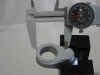
The next set of holes I drilled were those located on the buffer tower. This includes the (G) 1/2" drill and the (F) #40 drill. Like the two previous holes drilled, this set of holes aren’t extremely critical either because one is a clearance hole for the little tab that’s on a buttstock and the other is a detent hole for the rear take down pin. I will again use the 2 line scribe method, but this time there will be 4 sets of lines scribed since there are 2 separate hole locations. The first line I scribed was the distance from the top of the buffer tower to the center of the 1/2" hole, which was a distance of 1.696”…
Then I scribed a line for the detent hole. I set the calipers to 1.575” and again referenced the top plane of the buffer tower…
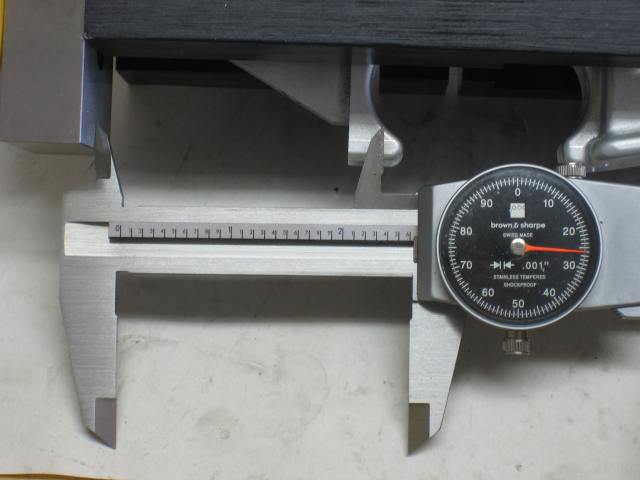
Next I scribed the other line for the 1/2" hole. I set the calipers to 0.818” and referenced the inside of the jig as shown in this pic…
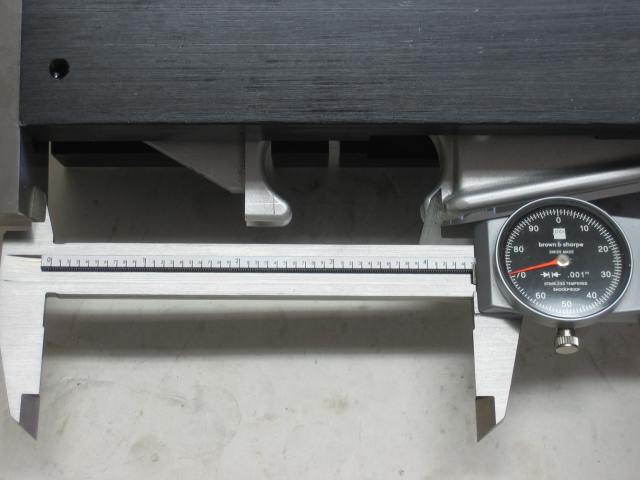
The last line to scribe was the distance from the inside of the jig to the center of the detent hole. This distance was 0.487”…
I then used a center punch to mark the locations of the two holes…

I drilled the detent hole first with a (F) #40 drill. This hole goes through to the rear take down pin 1/4" hole. Take the same precautions when drilling this hole as taken with the front take down pin detent hole…
Since it would be hard to hit the center mark with the (G) 1/2" drill, I made a little pre-drilled hole with the (F) #40 drill. Doing this will make
starting the 1/2" drill more forgiving…
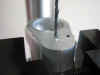
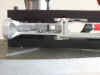
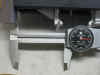
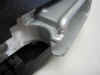
Then I used the (G) 1/2" drill to drill down approximately 1/4". The depth of this hole isn’t critical at all, because it’s just clearance for the little tab on the buttstock…
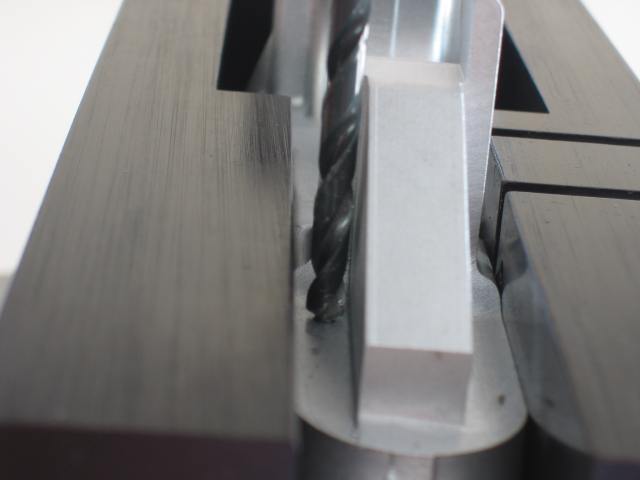
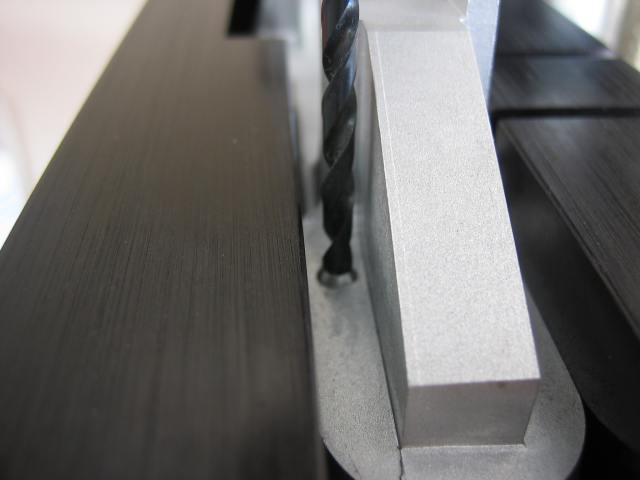
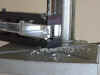
The next step in the 80% lower project is to drill the buffer tube hole out to
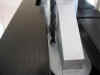
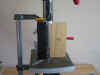
1 1/8” diameter with the (H) 1 1/8" drill. The lowest RPM my drill press will go to is 540 RPM. This is a little fast for this size of a drill. Unless you are able to get the jig very secure, this size of drill will tend to vibrate and chatter in the hole. This goes back to what I mentioned earlier about using a bigger drill to open up a smaller pre-drilled hole. So to solve this problem, I decided to just turn the drill chuck by hand while applying a little down pressure on the drill bit. I know this may sound a little crazy, but it works. Be patient when using this method because it’ll only work if you remove a little bit of material at a time. If you try to apply a lot of down force on the drill bit, then the drill bit will dig itself in the material and you won’t be able to turn it with your hand. To locate the drill to the pre-drilled hole, I simply kept moving the jig and turning the drill until the drill was even on all sides of the hole. I also used a 2x4 that was 7.25” long to support under the buffer tower…
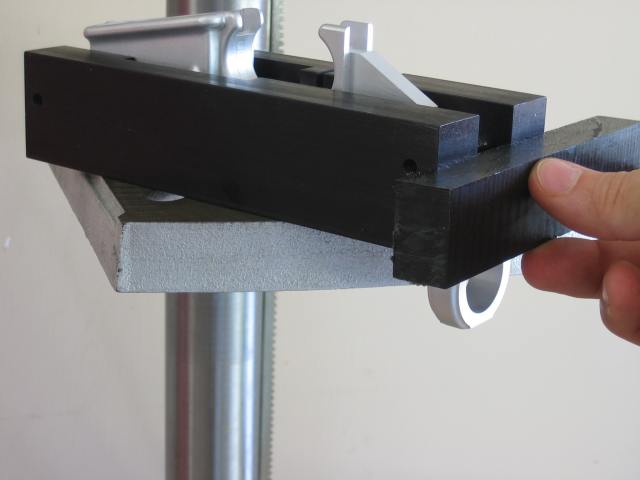
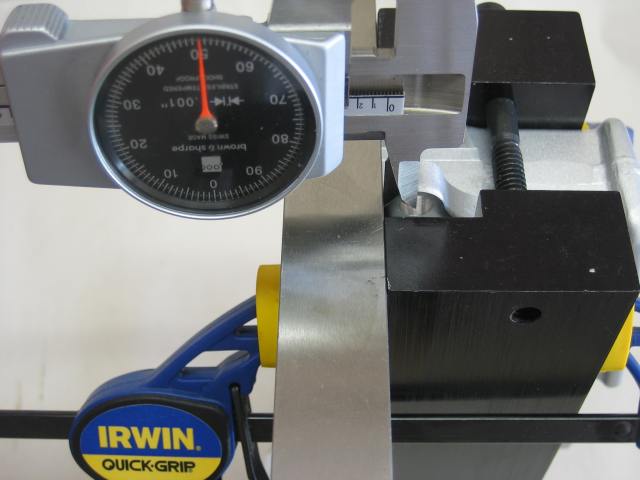
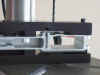
To better support the jig and receiver, I used a Columbian Clamp. Below is a pic showing my setup during the drilling process…
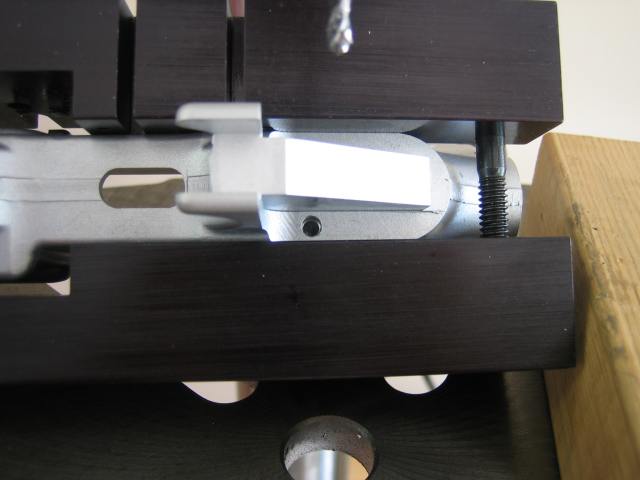
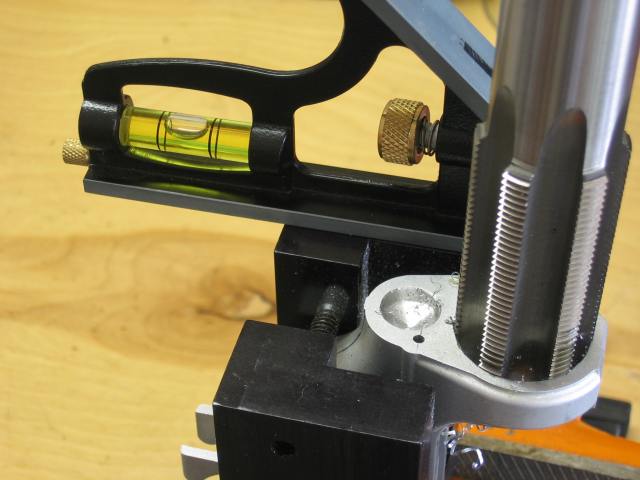
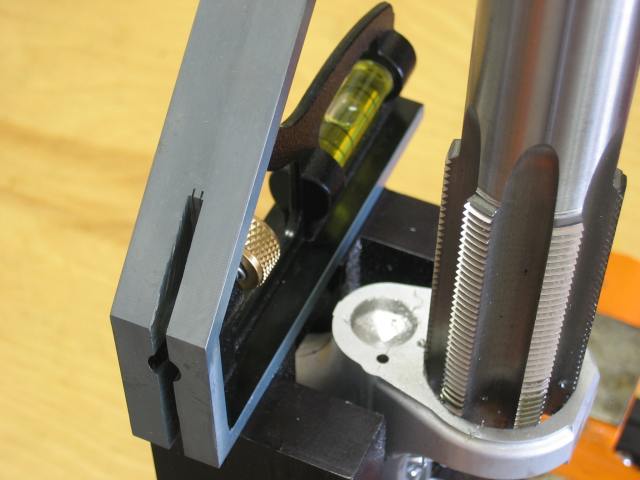
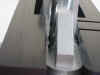
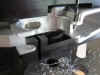
Now it was time to tap the buffer hole with the (L) 1 3/16-16 tap. Some people get
worried about tapping this hole, but it’s not a big deal at all. With a little patients anybody can do it. Basically the idea is to get the jig in a bench vice setting
it level both front to back and side to side. Then barely start the tap into the hole and insure it stays level with the
jig by placing the level on the front
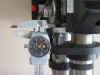
and side of the tap. Do not go more than 1/4 of a turn without checking to insure the tap and jig are both still level. After about 5 or 6 turns, you should be able to stop checking the tap, because at that point there is no turning back, you will simply have either done it correctly or not. Make sure you use plenty of cutting fluid, as it will make turning the tap a whole lot easier. Below is a pic showing the jig is level left to right…
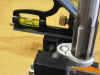
And below is a pic showing the jig level front to back…

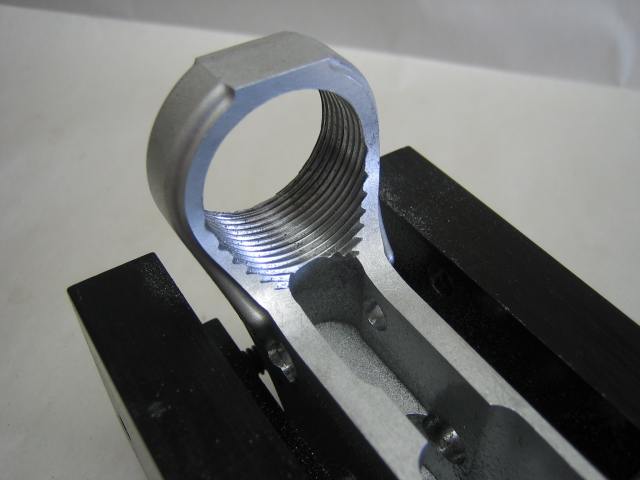
After a few turns of the tap, you should have something that looks like this…
Next, it was time to drill and tap the pistol grip hole. This is a super easy hole to complete because again, it’s not critical. If you happen to get this hole off location a little bit, you can simply open up the hole that’s in the pistol grip itself. The idea to drill and tap this hole is to slide the pistol grip on the lower receiver, and then use a sharpie marker to mark the location of the hole. The pic below shows the pistol grip on the lower ready to have the hole location marked…

After you mark the location and remove the pistol grip, you should have something like this…
Next you need to prop up the buffer tower end with a block that is 2.500” tall. Using the block will insure the area you are about to drill is flat. I had to use a piece of board for the block and jig to set on since my drill table wasn’t large enough…
I used the (J) #3 drill for the pistol grip hole. Here is what it should look like after you have the hole drilled…

Then I used the (K) 1/4-28 tap to finish up the hole. Again, go slow and use plenty of cutting fluid and you shouldn’t have any problem tapping this hole by hand…
When you are done it should look like this…
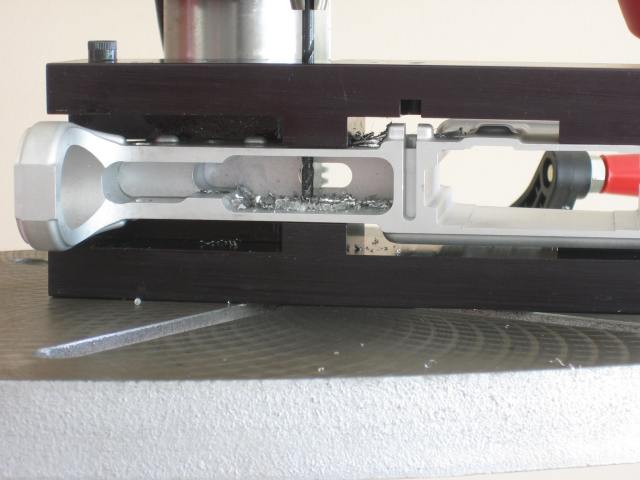
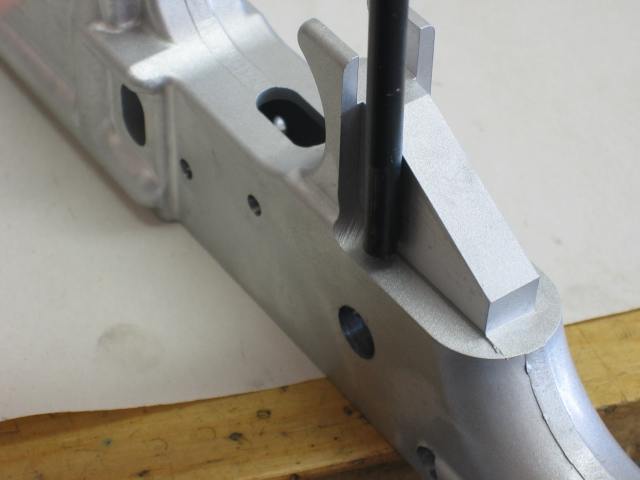
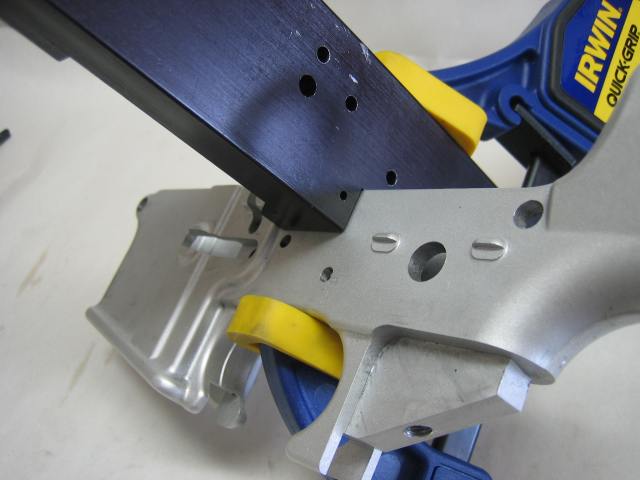
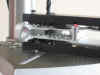
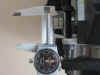
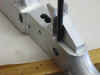
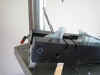
The next step is to use the (I) #42 aircraft extension drill to drill the bolt catch pin hole. The jig makes this one of the easiest steps in the 80% project. Simply slap jig on the receiver as show below and secure it with a C-clamp. I used the Irwin Quick Grip clamp. You don’t have to use a clamp, it just makes the job a little easier…
I put the (I) #42 aircraft extension drill in my cordless drill and drilled through both ears of the bolt catch area. Below is what it looks like after the hole is drilled…
The 80% project is almost complete. The last step is to drill the trigger guard pin holes. Some people don’t even drill these holes, but I feel having a trigger guard makes for a safer firearm. As with several other holes in the AR15 lower, the trigger guard pin holes aren’t critical. I will once again use the 2 line scribe method. I will need the receiver back in the jig to use this method. I scribed the first line at a distance of 2.430” from the top of the jig to the trigger guard area. This distance was scribed on the front and rear of where the trigger guard pin holes will be…

Next, I used a flat object and placed it at the rear of the jig and scribed a line at a distance of 2.626”…
The same thing was done for a distance of 4.471”…
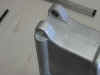
Before I drilled these holes, I wanted to make some clearance for the drill on the front trigger guard pin hole. I used the dremel with a sanding stone and ground a little indention for the clearance. While I had the dremel out, I put on the sanding band and cleaned up the forging marks left in the center of the receiver. You don’t have to remove these forging marks, I just think it makes for a better looking lower. Below is a pic after all of this was done…
Next, I used the (C) 1/8 drill to drill the front and rear trigger guard pin holes. The rear hole goes all the way through, but the front only goes through the right hand side of the receiver. I drilled both holes while the jig was laying on the left hand side of the receiver. You will need to set the jig on a flat object so the bolt heads don’t get in the way. Below is what it looked like after these holes were drilled…
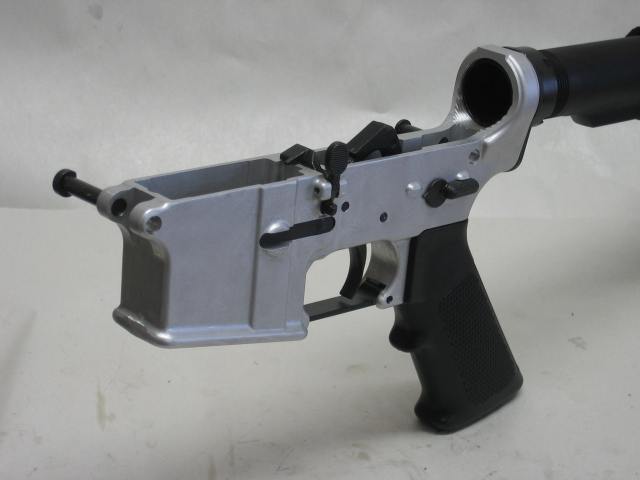
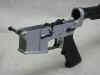
The 80% AR15 lower receiver is now 100% complete firearm. All of the internals from the AR15 parts kit fell right into place…
V.
Conclusion:
I slapped an upper on this new firearm and took it out shooting and I didn’t have any problems at all. The only difference I could tell between this AR15 and any other one
"store bought" AR15 was it has a silver lower receiver. But I will soon give the lower a black anodize finish.
Finishing an 80% AR15 lower is not hard at all. Just be sure to take your time, and always remember to measure twice and cut once. As you probably noticed several of the holes in the AR15 lower receiver are not critical at all. The CNC jig takes all the guesswork out of finishing this project. I believe anybody can finish an 80%’er if they have
patience.
As mentioned in the introduction, the steps I took to complete my 80% lower may not be the same steps you take. There are easier and harder ways to complete this project, it all depends on what tools you have access to. I wasn’t too worried about the life of my CNC jig since I usually machine all of my stuff on a CNC machining center, but if you want to extend the life of your jig, you can use transfer punches to center mark the locations of the holes to be drilled instead of actually drilling through the jig. As you can see in this
tutorial, the jig can be used for much more than just drilling the side holes in the lower receiver. Even after you have the lower receiver complete you will find ways to use
it.
All information contained in this tutorial is for educational purposes.